Deploy Cluster Profile Updates
Multi-cluster environments create administration and maintenance challenges as they grow.
-
Operational Efficiency: Increased manual work hours to maintain and update the environment as more clusters are built.
-
Build Consistency: New clusters may be built with a profile different from their counterparts. This could impact performance of hosted services or cause them to fail.
-
Configuration Drift: Clusters needing matching configurations may not receive them simultaneously. This could impact performance of hosted services or cause them to fail.
Palette provides cluster profiles, which allow you to specify layers for your workloads using packs, Helm charts, Zarf packages, or cluster manifests. Packs serve as blueprints to the provisioning and deployment process, as they contain the versions of the container images that Palette will install for you. Cluster profiles provide consistency across environments during the cluster creation process and when maintaining your clusters. Check out the cluster profiles section to learn more about creating and using them.
| Method | Description | Cluster application process |
|---|---|---|
| Cluster profile versions | Create a new version of the cluster profile with your updates. | Select the new version of the cluster profile. Apply this new profile version to the clusters you want to update. |
| Cluster profile updates | Change the cluster profile in place. | Palette detects the difference between the provisioned resources and this profile. A pending update is available to clusters using this profile. Apply pending updates to the clusters you want to update. |
| Cluster overrides | Change the configuration of a single deployed cluster outside its cluster profile. | Save and apply the changes you've made to your cluster. |
This tutorial will teach you how to update a cluster deployed with Palette to Amazon Web Services (AWS), Microsoft Azure, Google Cloud Platform (GCP), or VMware infrastructure providers. You will explore each cluster update method and learn how to apply these changes using Palette or Terraform.
Palette has backup and restore capabilities available for your mission-critical workloads. Ensure you have adequate backups before making any cluster profile version changes in your production environments. You can learn more in the Backup and Restore section.
Prerequisites
- An active Palette cluster. This tutorial builds upon steps in Getting Started. Complete the steps for your preferred cloud provider.
Set Up Cluster
After completing the prerequisites, your cluster should be successfully provisioned, in a healthy state, and the hello-universe application be installed and functional.
In Palette, navigate to the left main menu and select Clusters. Select the cluster you created in the Getting Started tutorials.
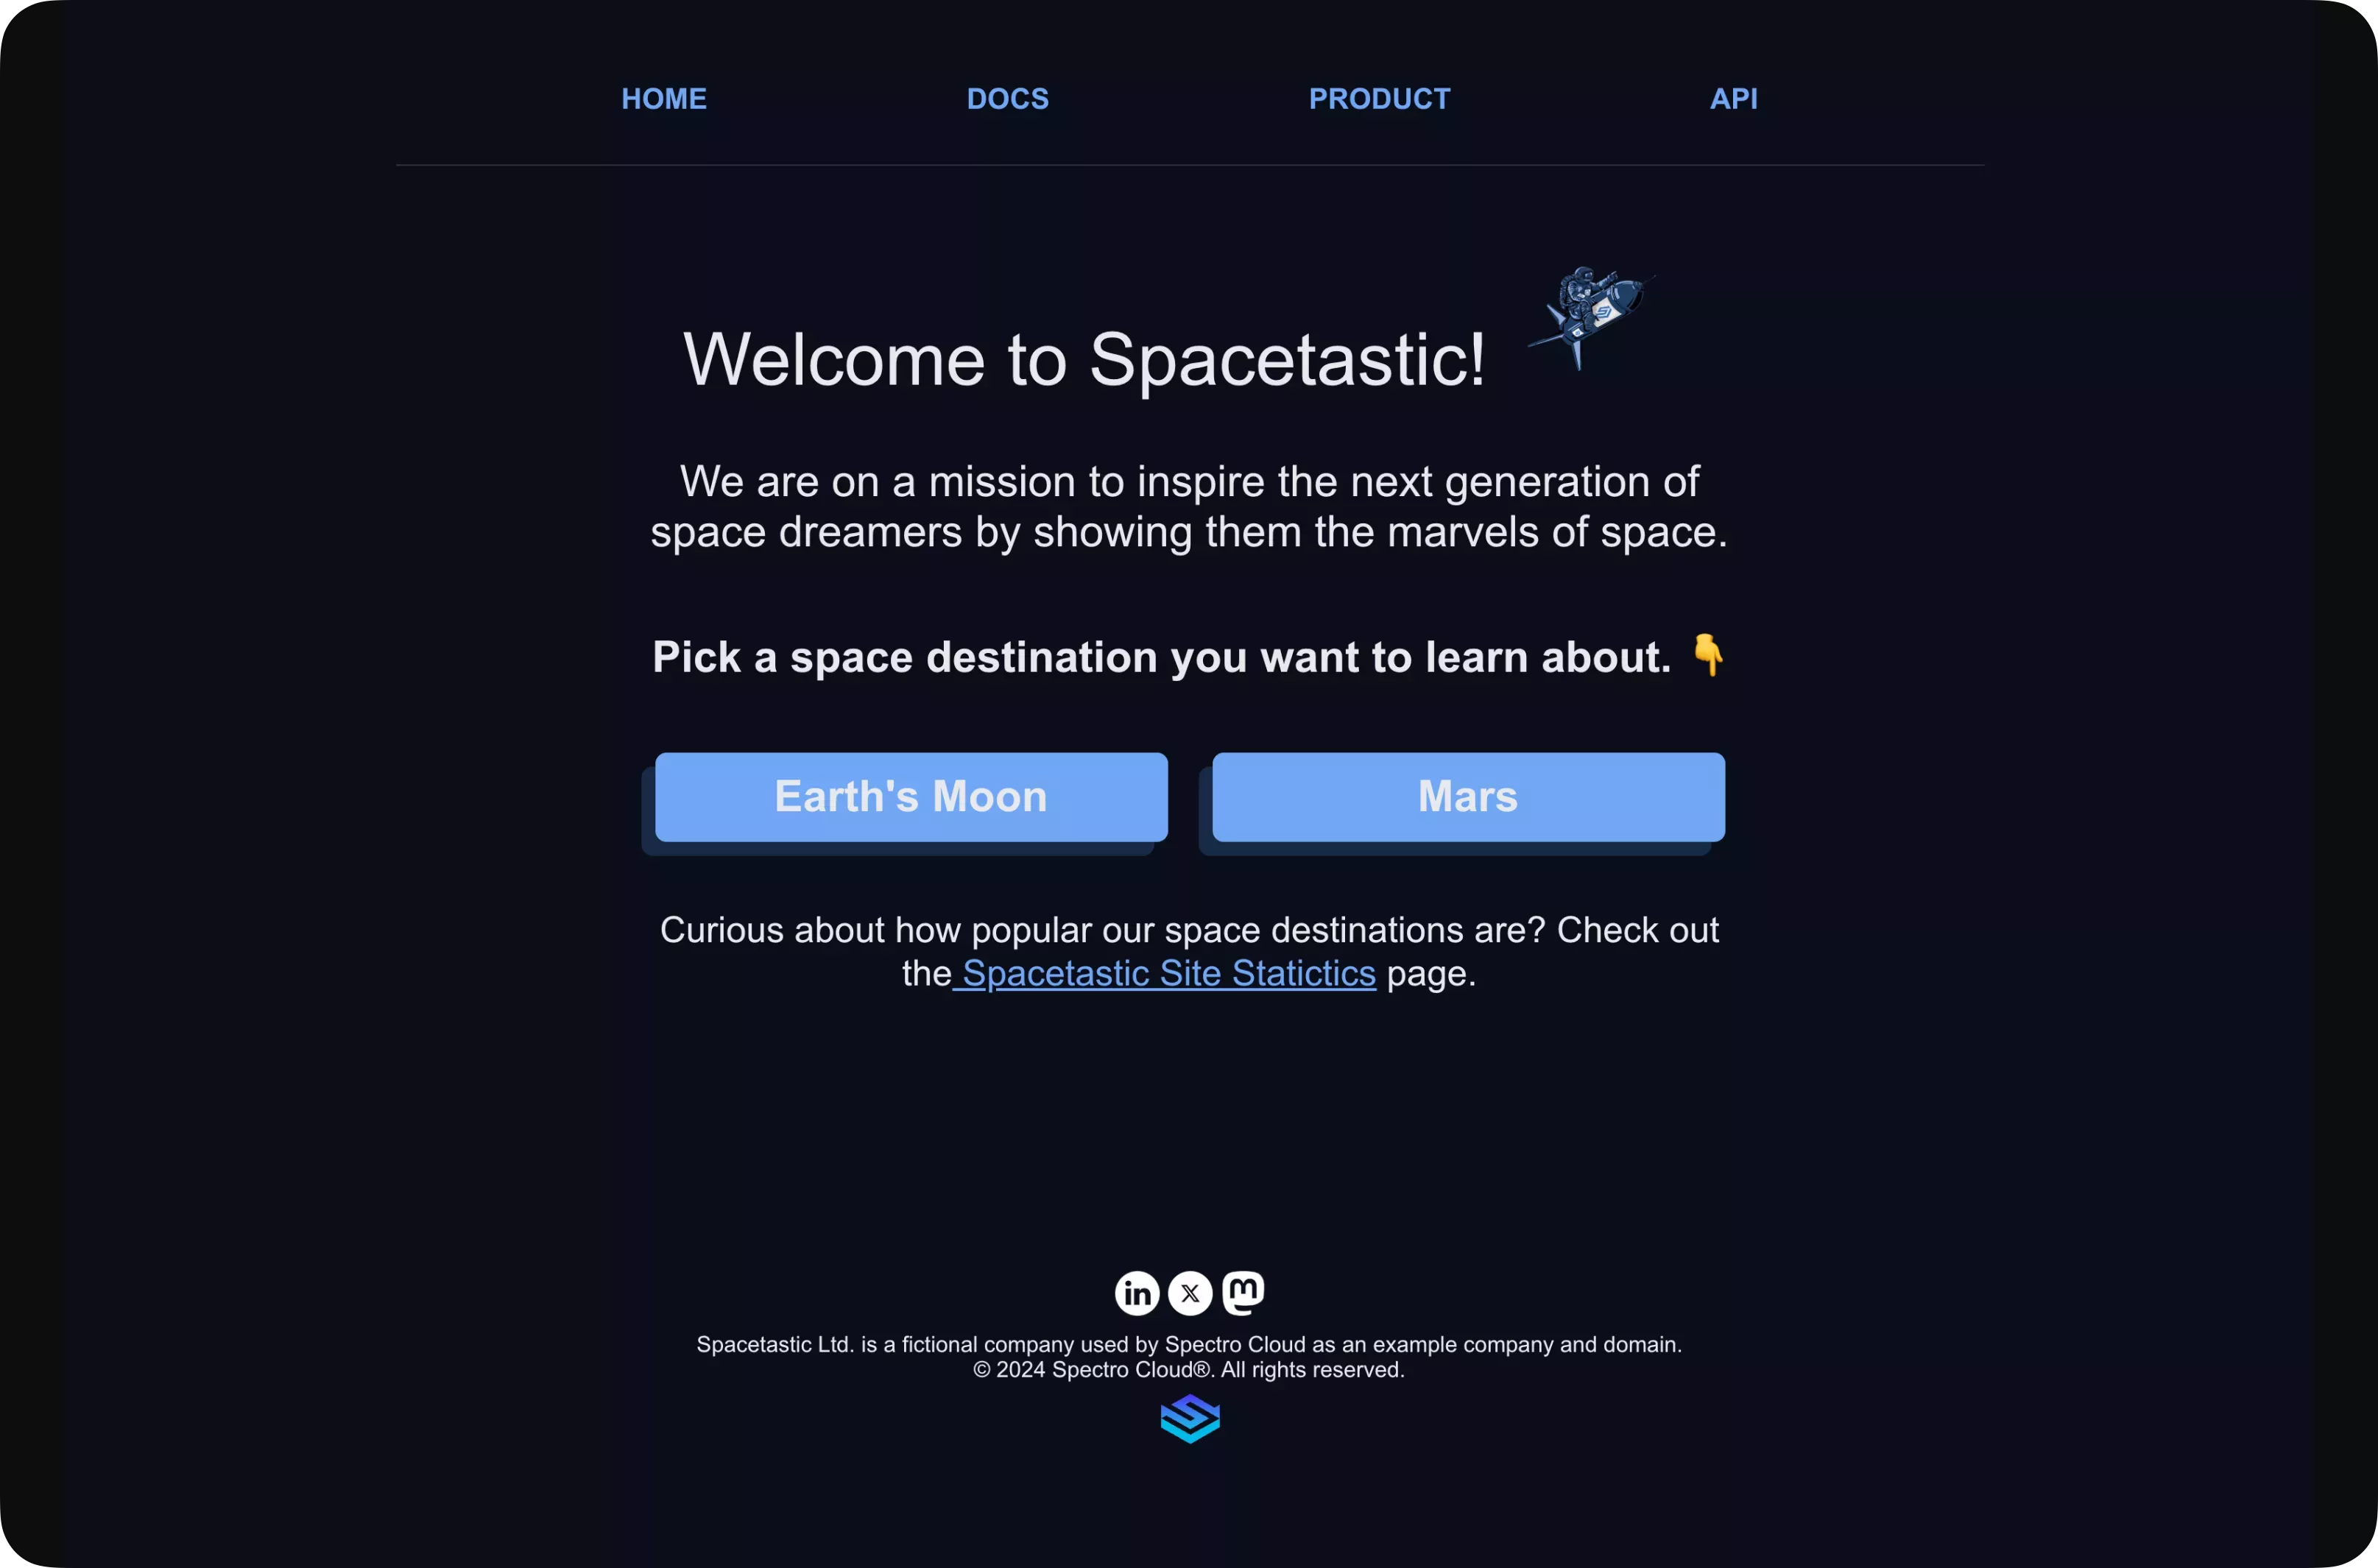
Select the URL link for port :8080 to access the Hello Universe application.
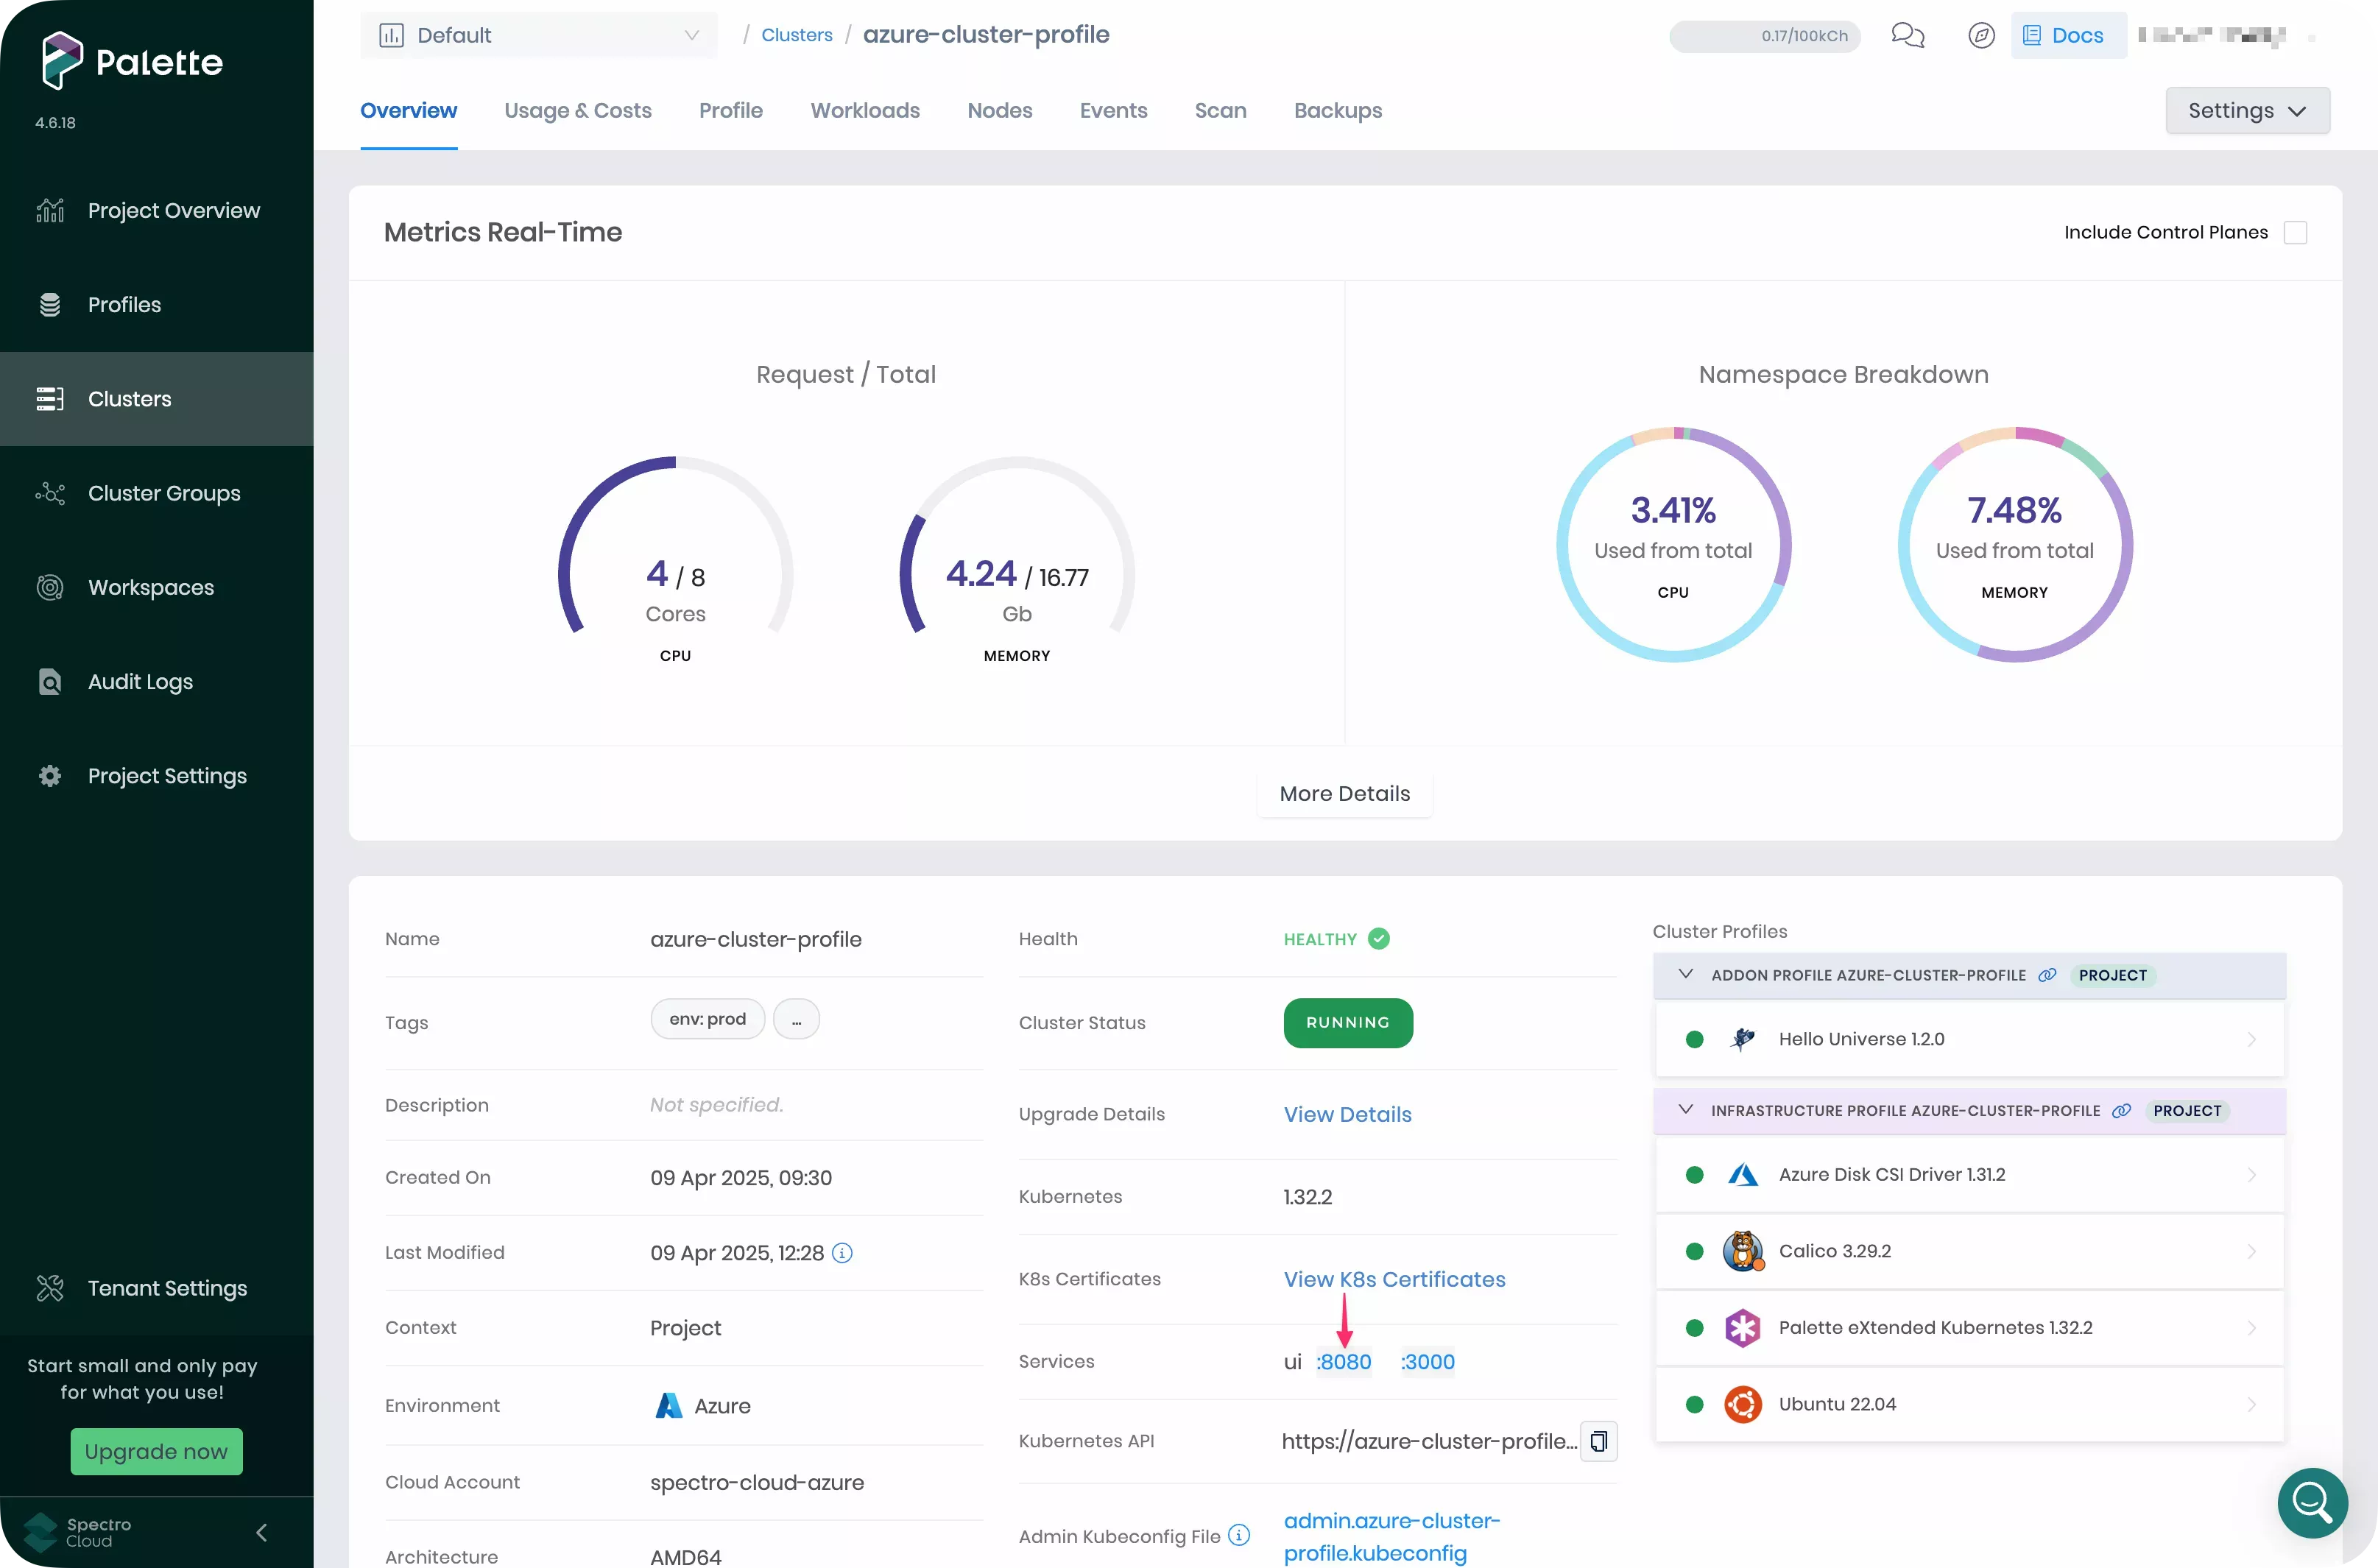
Your result should be similar to the below screenshot.
Create Cluster Profile Versions
Palette supports the creation of multiple cluster profile versions using the same profile name. This gives you better change visibility and control over the layers in your host clusters. Profile versions are commonly used to add or remove layers and pack configuration updates.
The version number of a given profile must be unique and use the semantic versioning format major.minor.patch. If you
do not specify a version for your cluster profile, it will default to 1.0.0.
In Palette, navigate to the left main menu and select Profiles to view the cluster profile page.
Select the cluster profile created during setup from the list of profiles displayed in the left main menu.
The current profile version is displayed in the drop-down menu beside the profile name. This profile has the default value of 1.0.0, as you did not specify another value when you created it. The cluster profile also shows the host clusters currently deployed with this cluster profile version.
Select the version drop-down menu and choose the Create new version option.
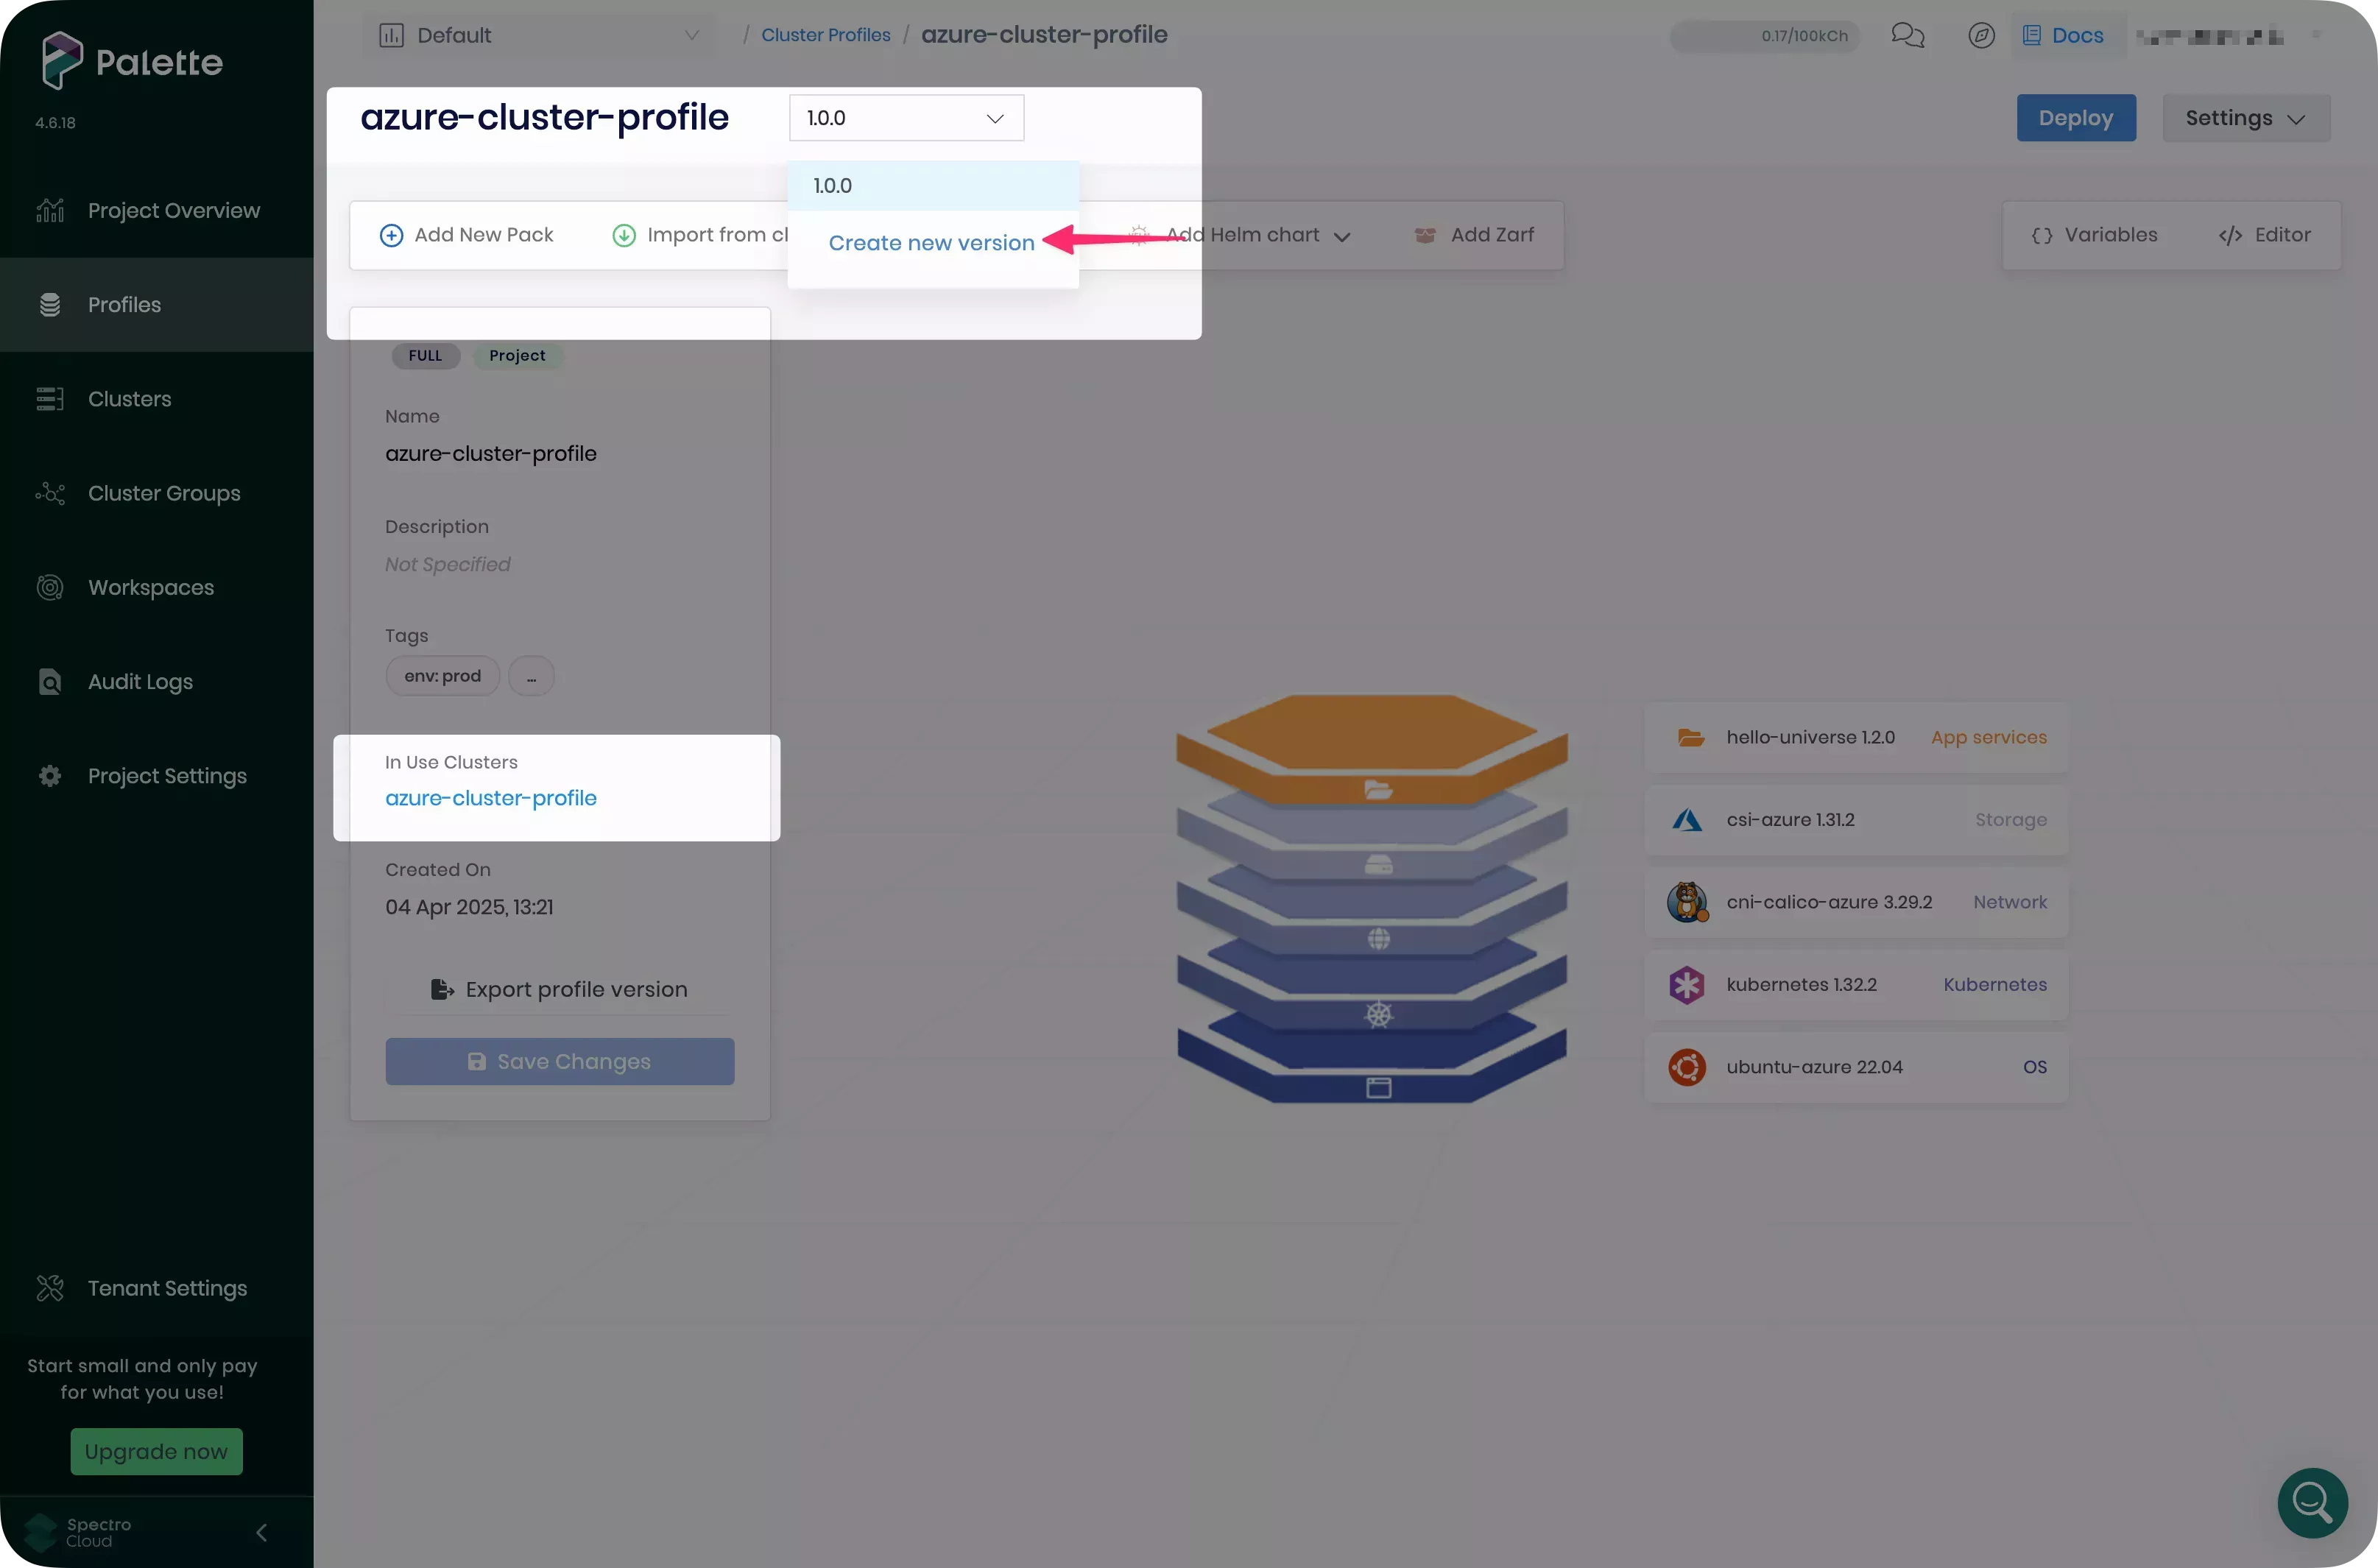
A dialog box appears. Fill in the Version input with 1.1.0. Select Confirm.
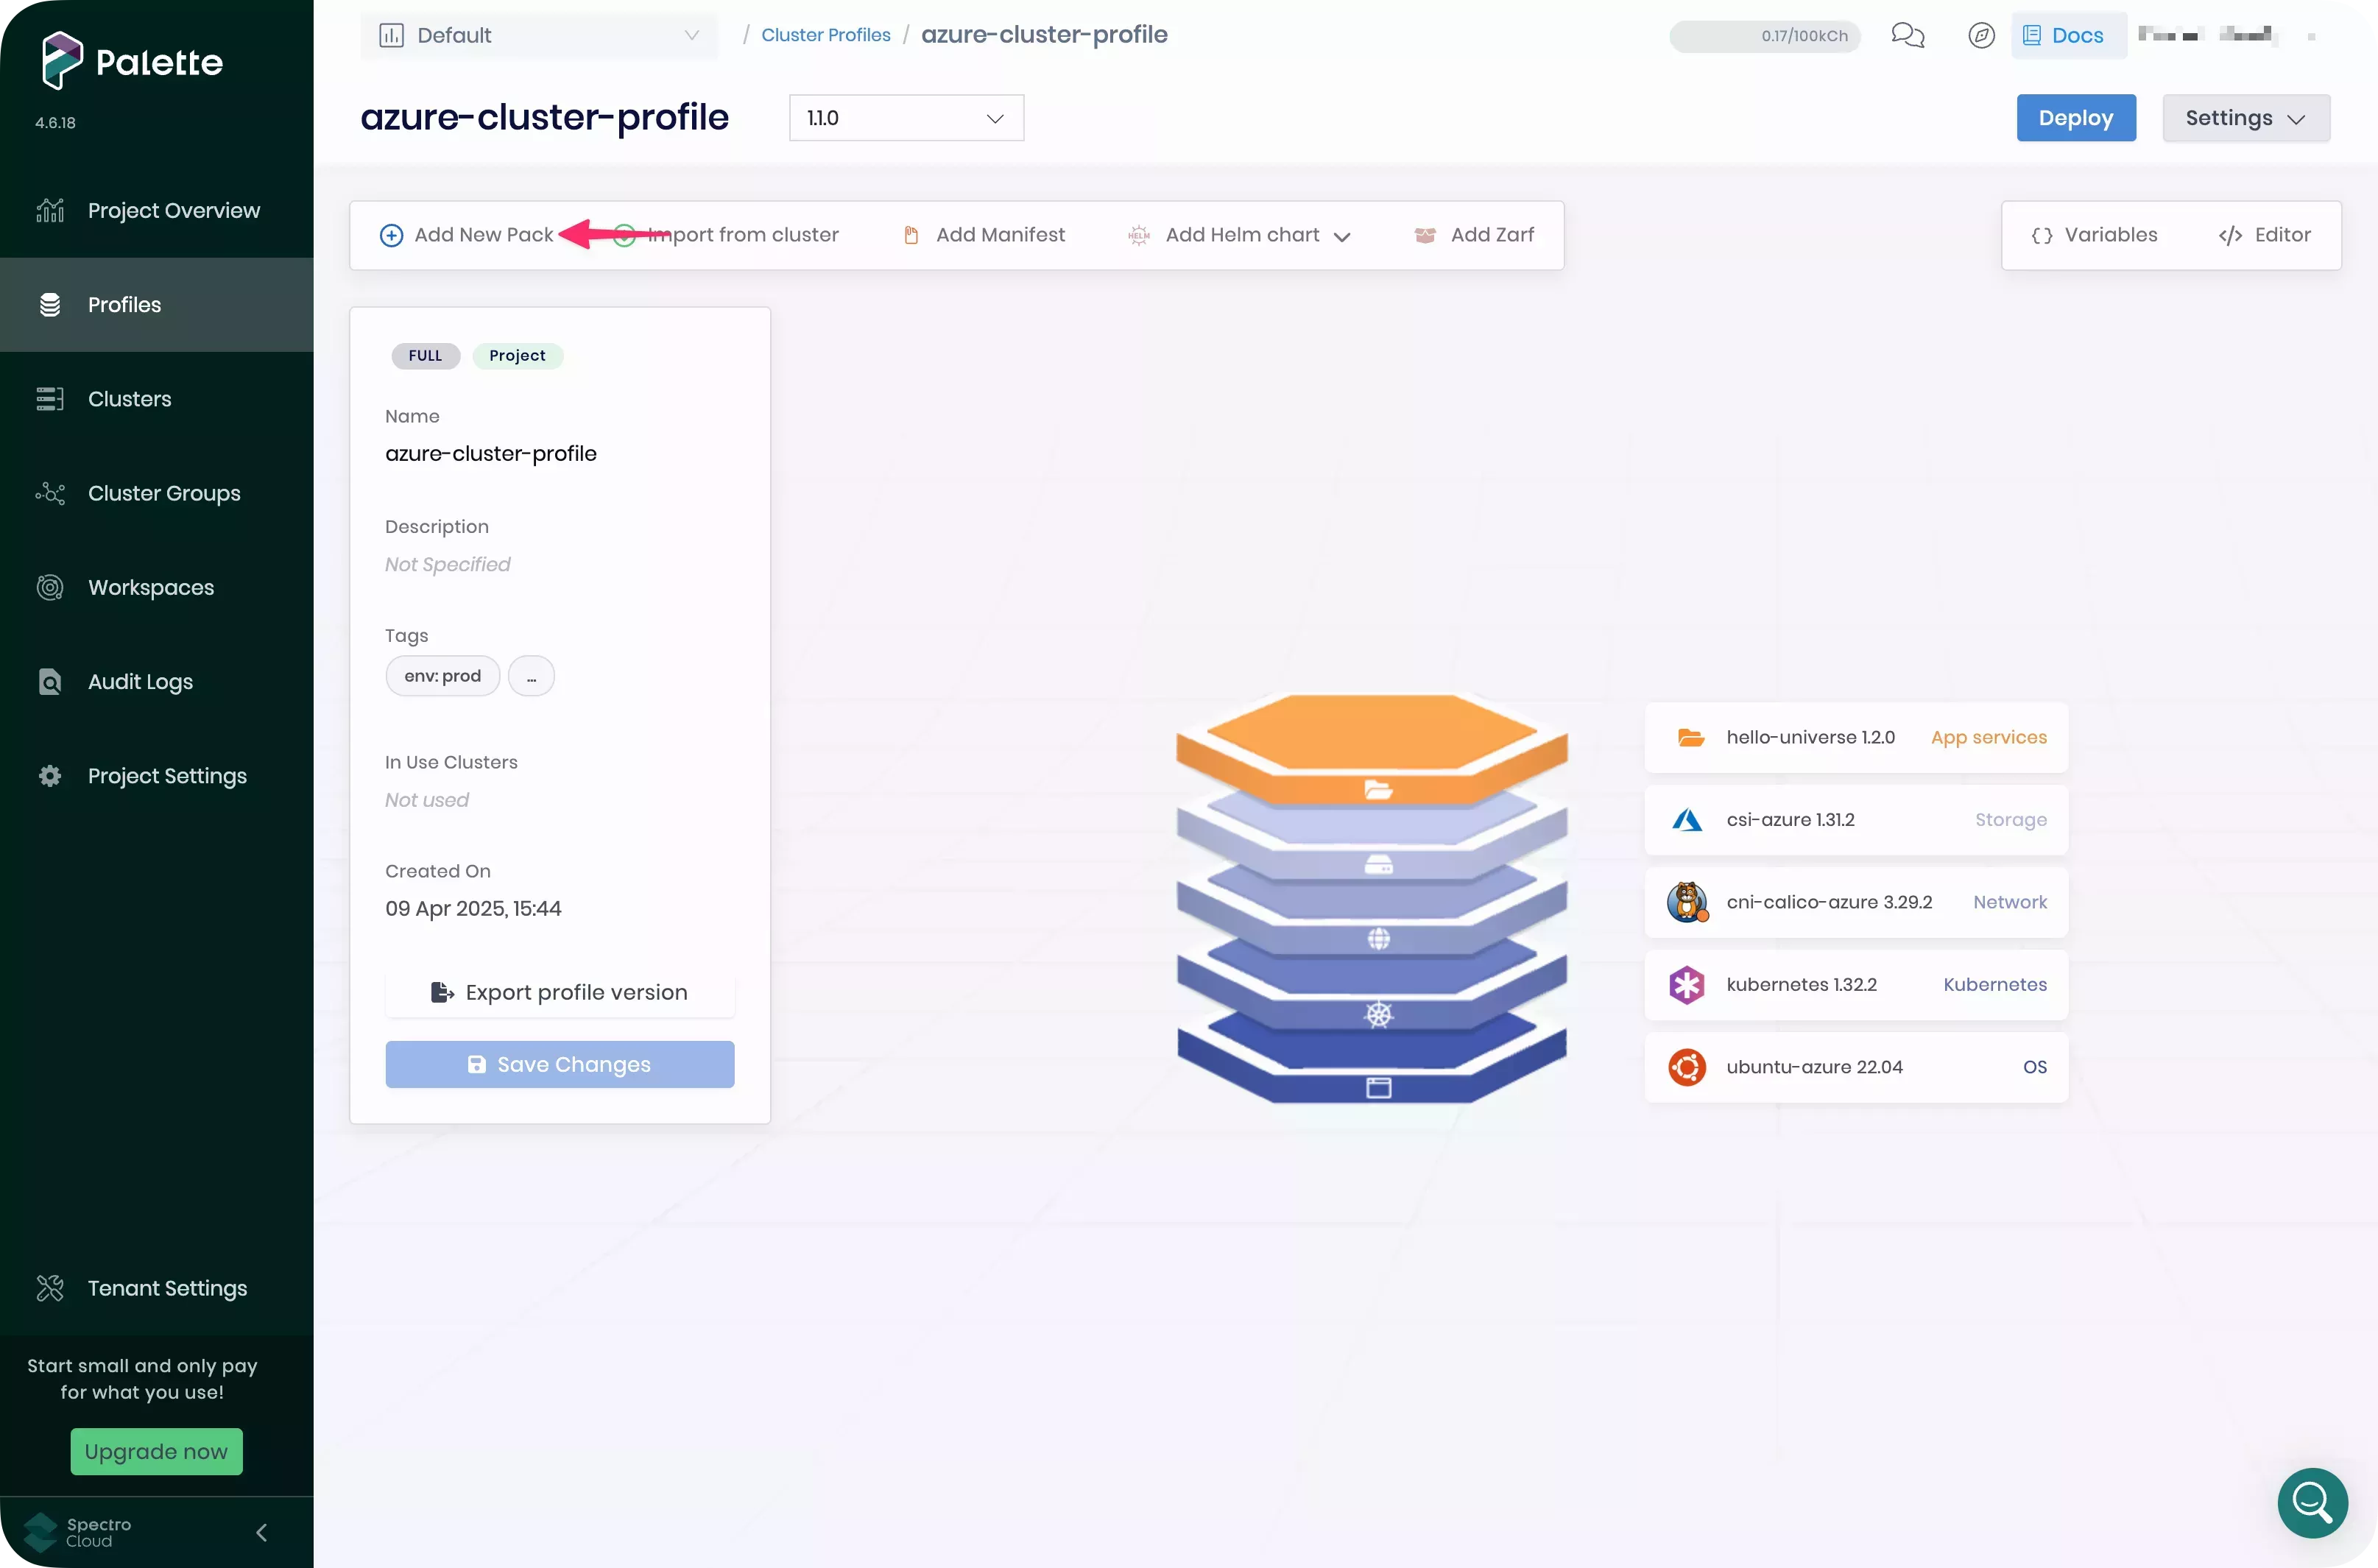
Palette creates and opens the new cluster profile version on your screen. The version drop-down menu now displays the newly created 1.1.0 profile. This version has the same packs as version 1.0.0, which it was created from.
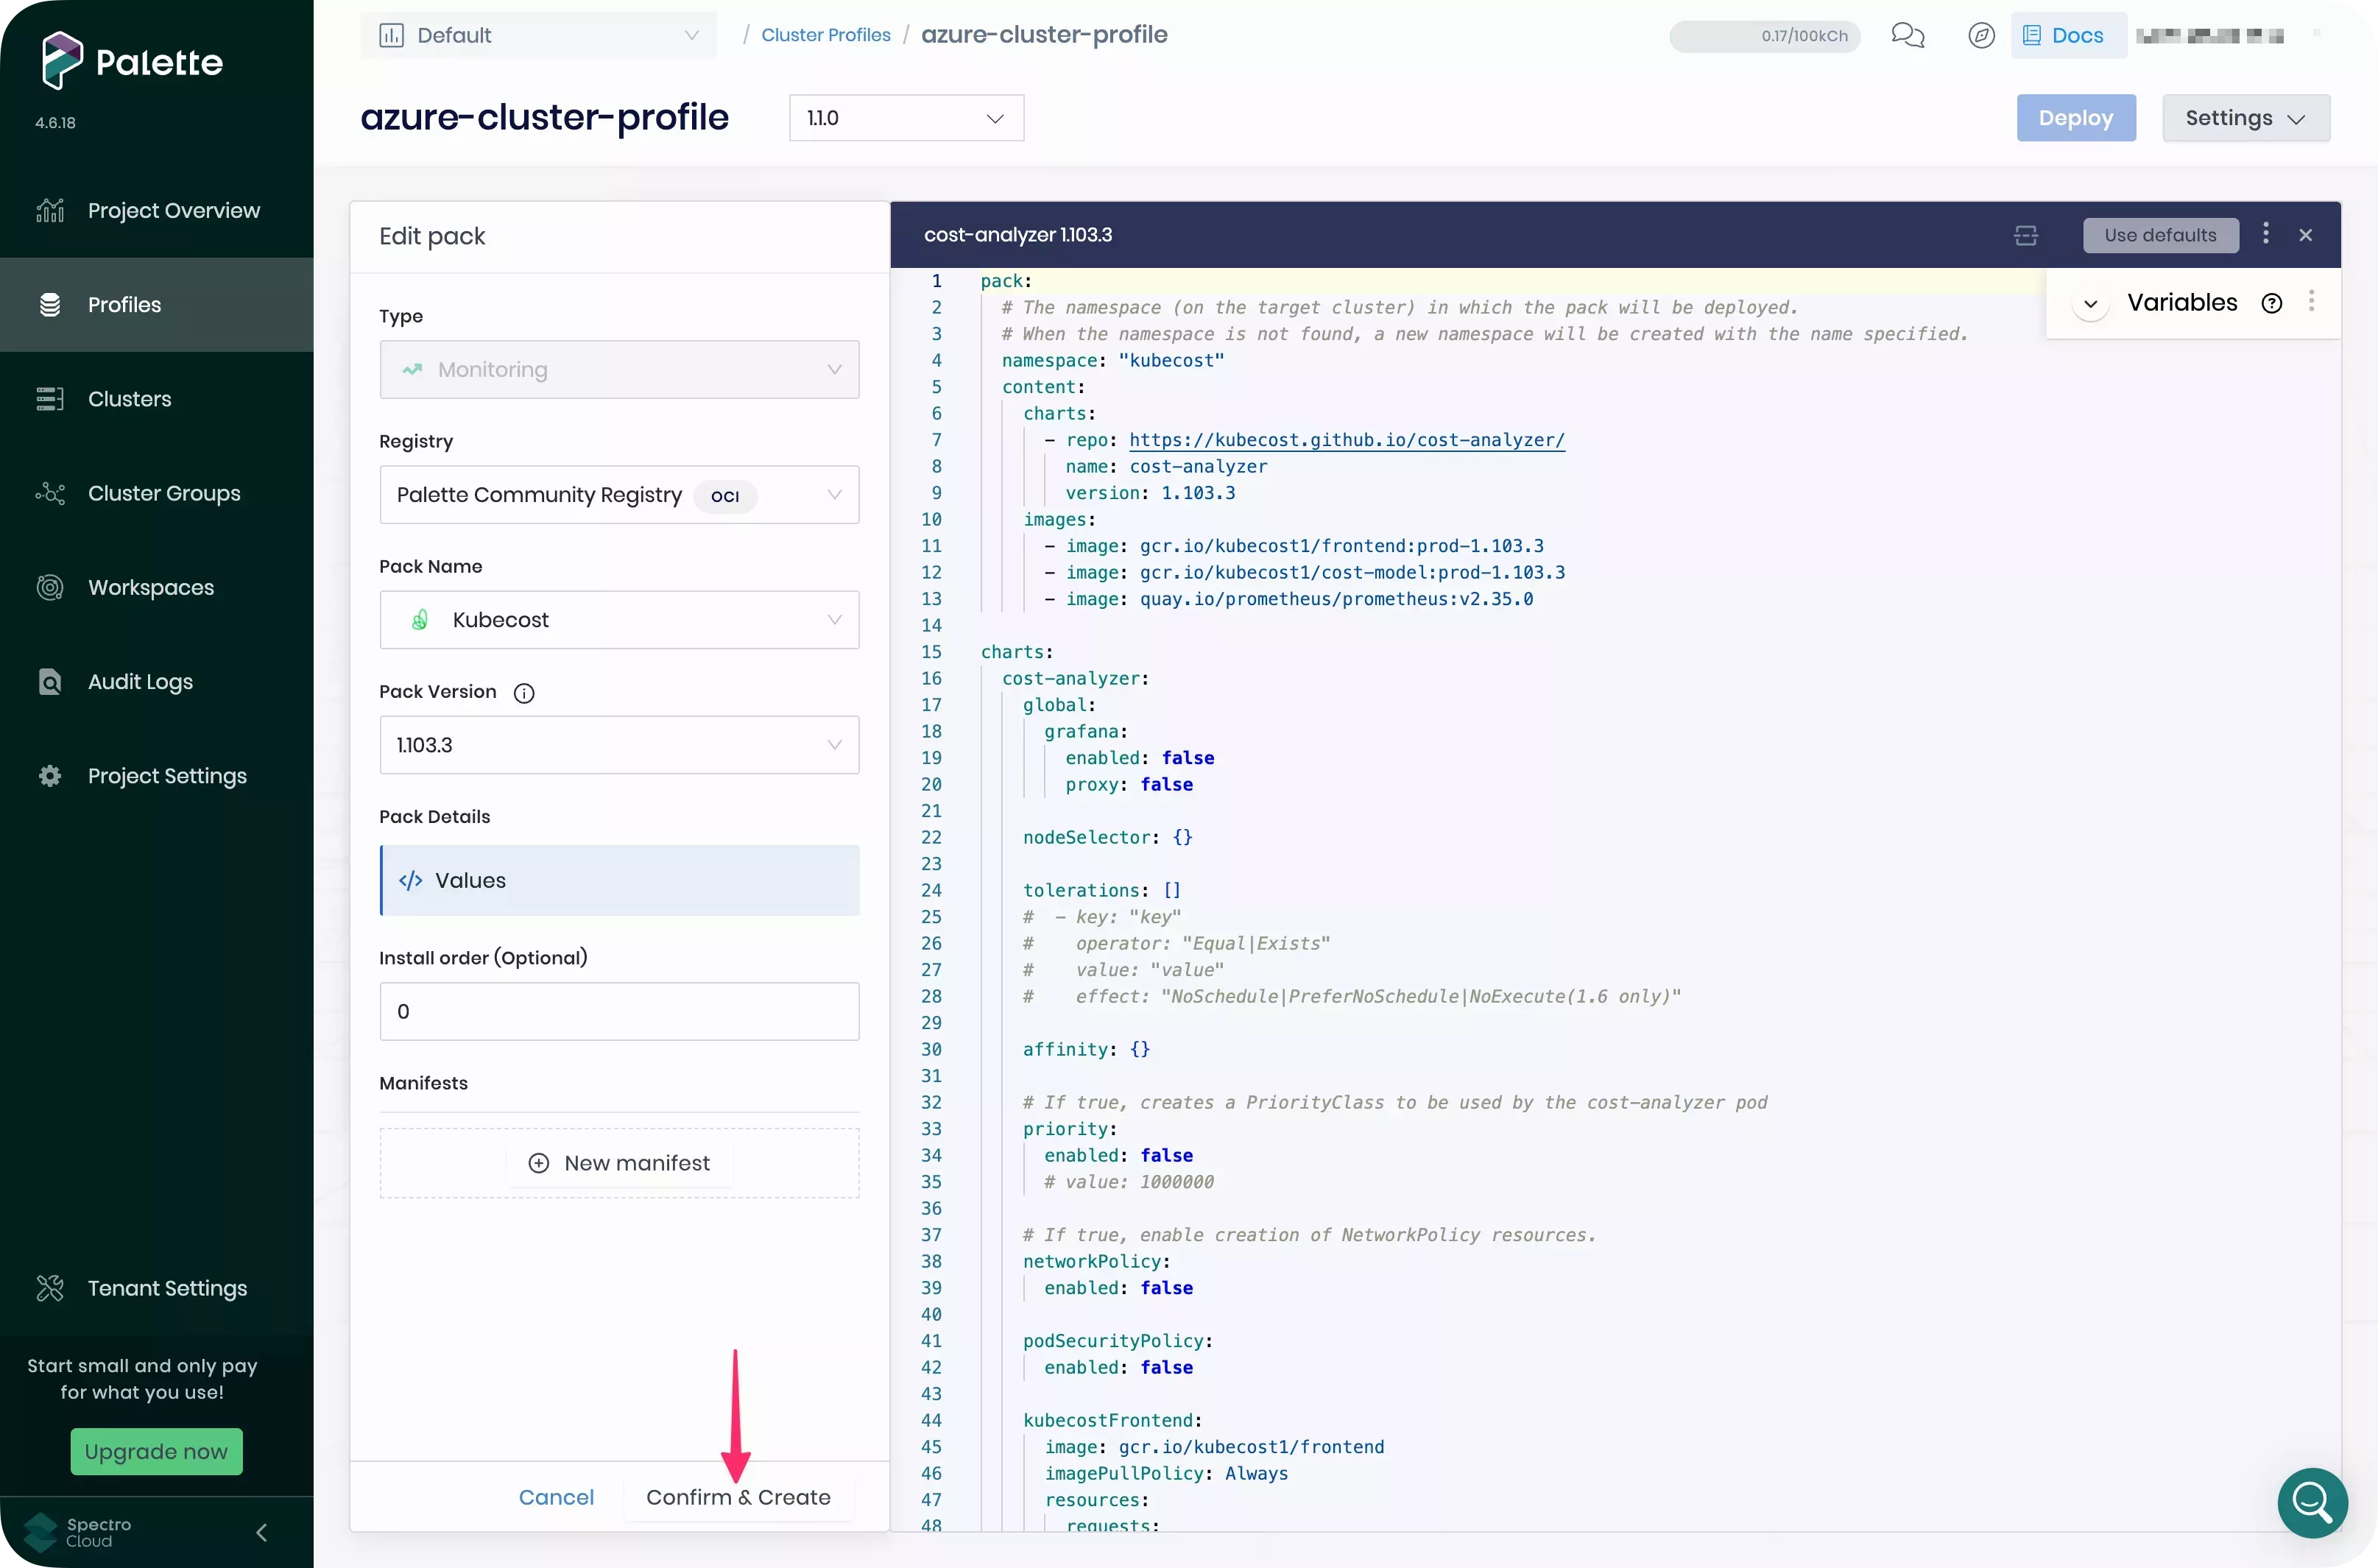
Select Add New Pack.
Search the Palette Community Registry for the Kubecost pack and select it.
The next screen shows the configurations the pack will apply to your cluster. No changes to the manifest are required for this tutorial. Select Confirm & Create to continue.
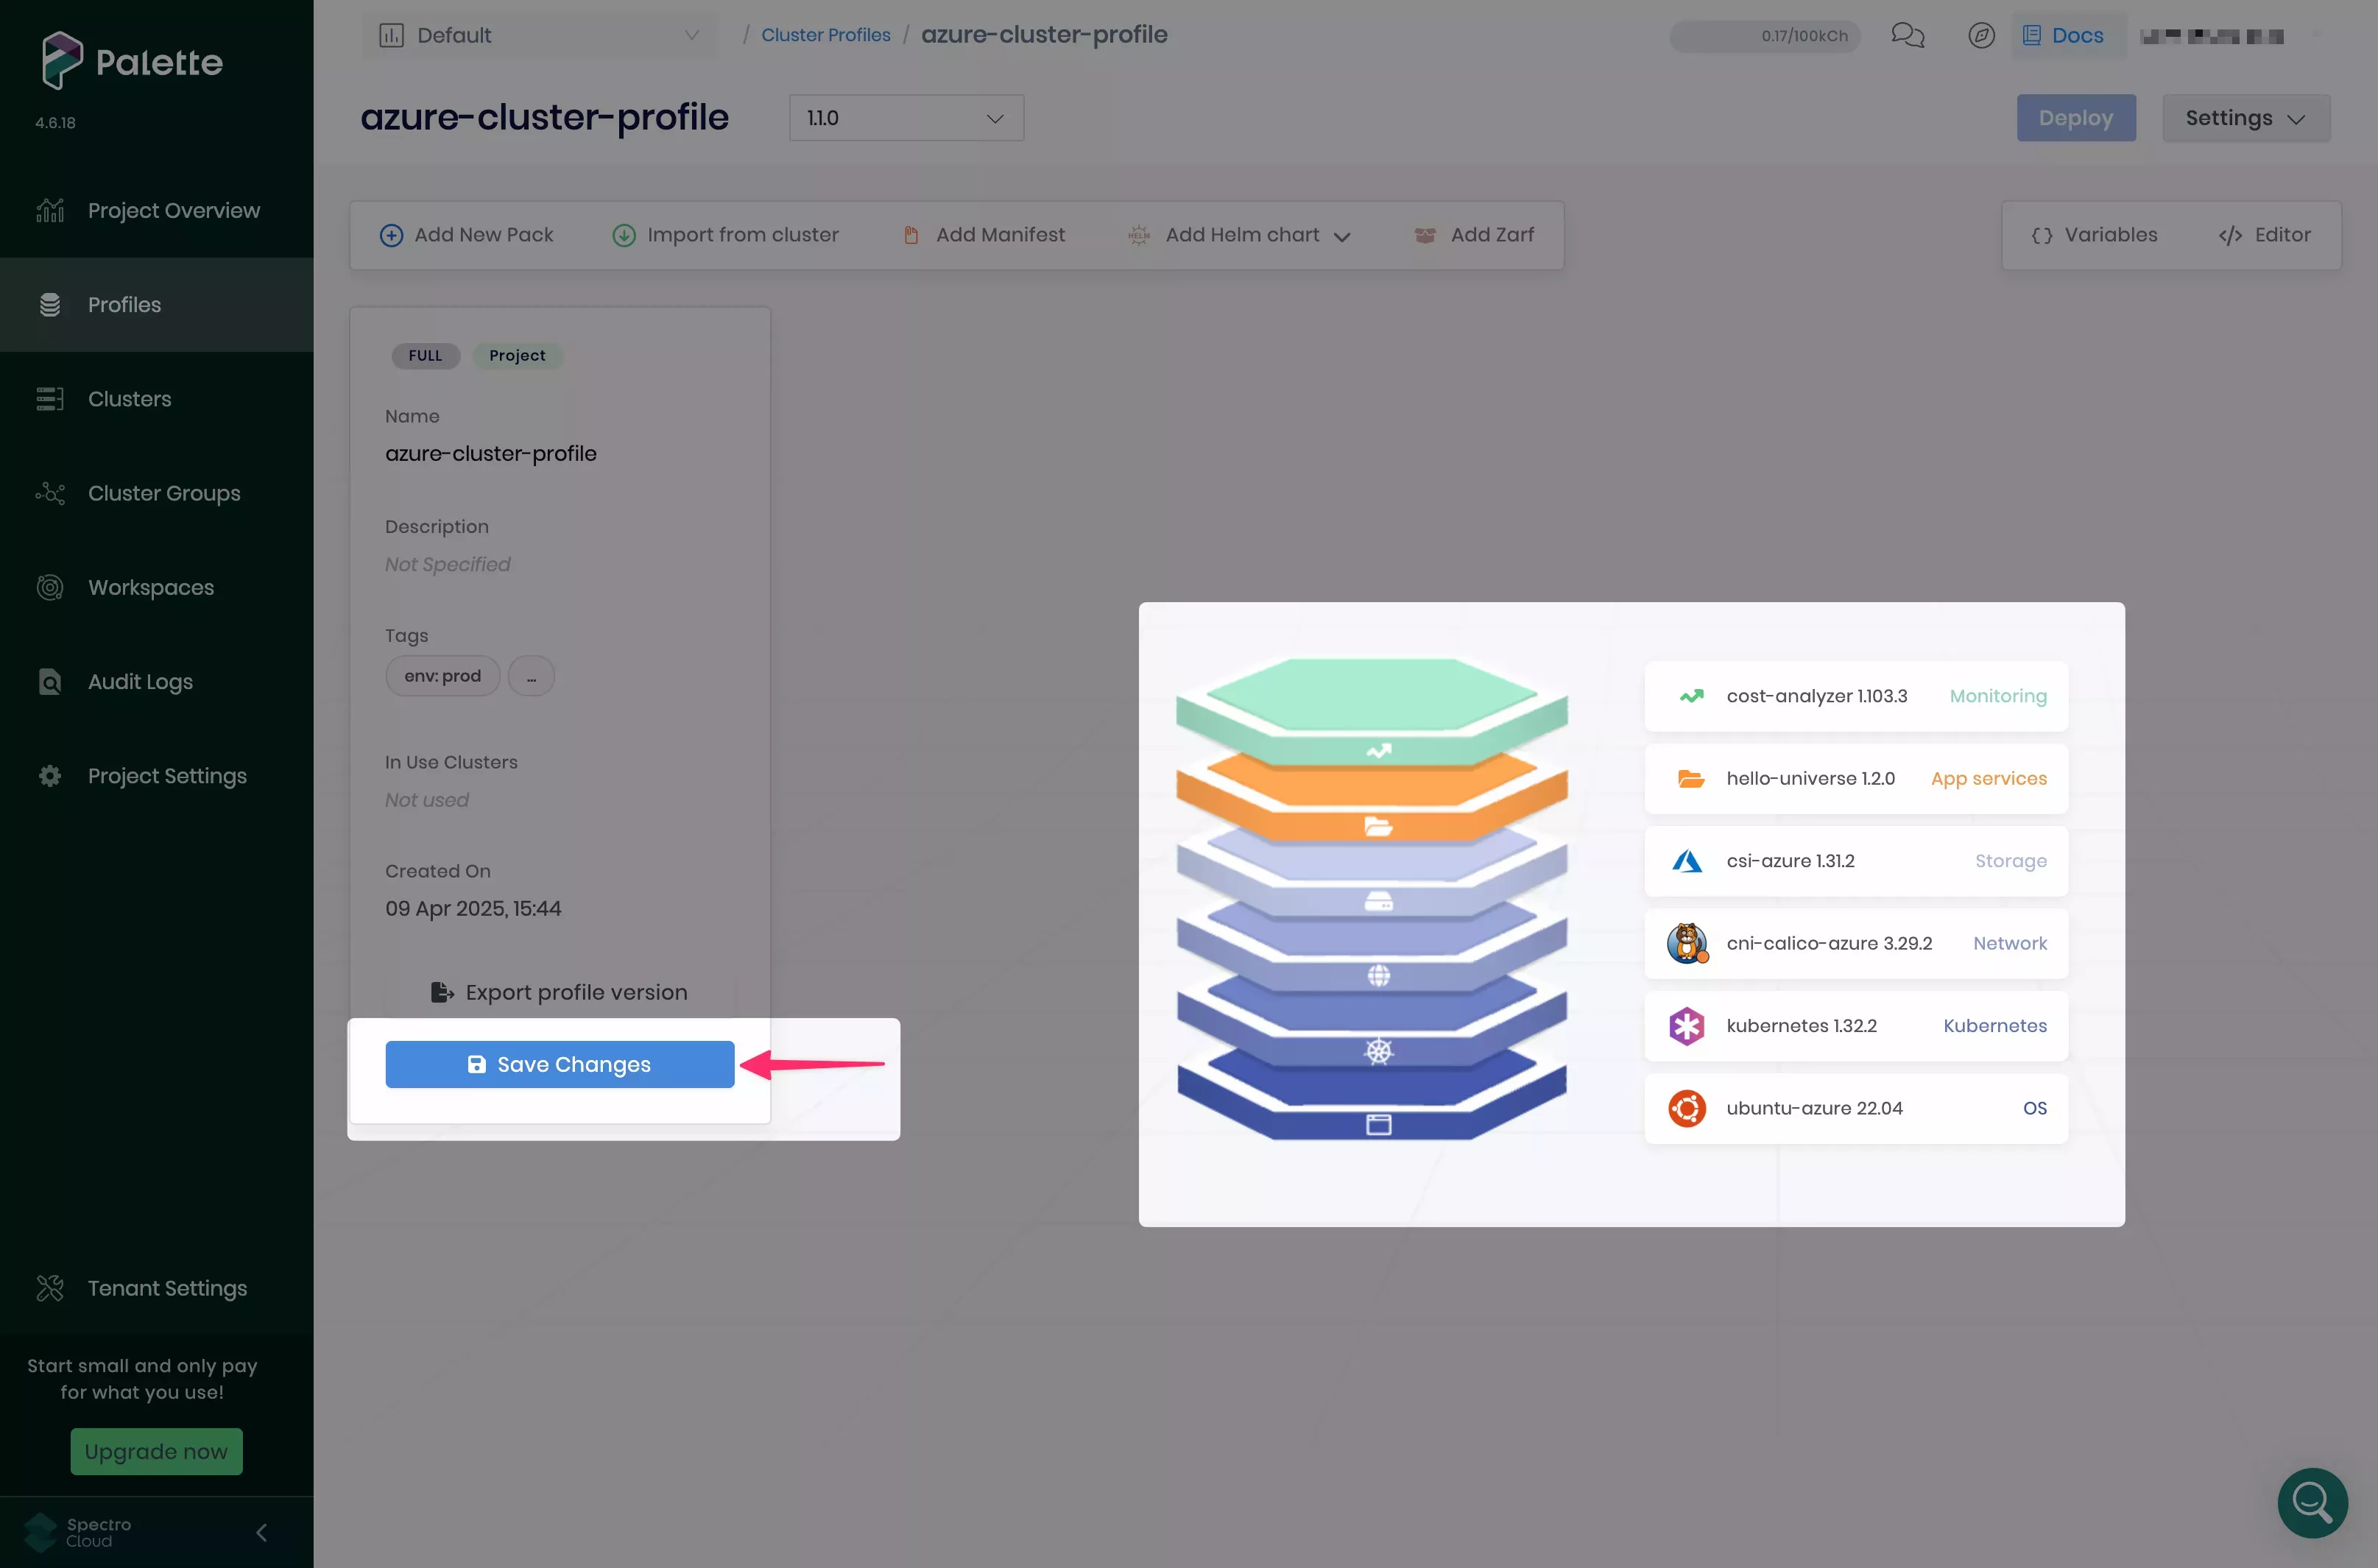
Confirm the changes you made. The configuration stack diagram shows the cost-analyzer pack (Kubecost) at the top.
Select Save Changes to confirm your updates.
Deploy Cluster Profile Version Updates
Navigate to the left main menu and select Clusters. Select the cluster you created in the Getting Started tutorials.
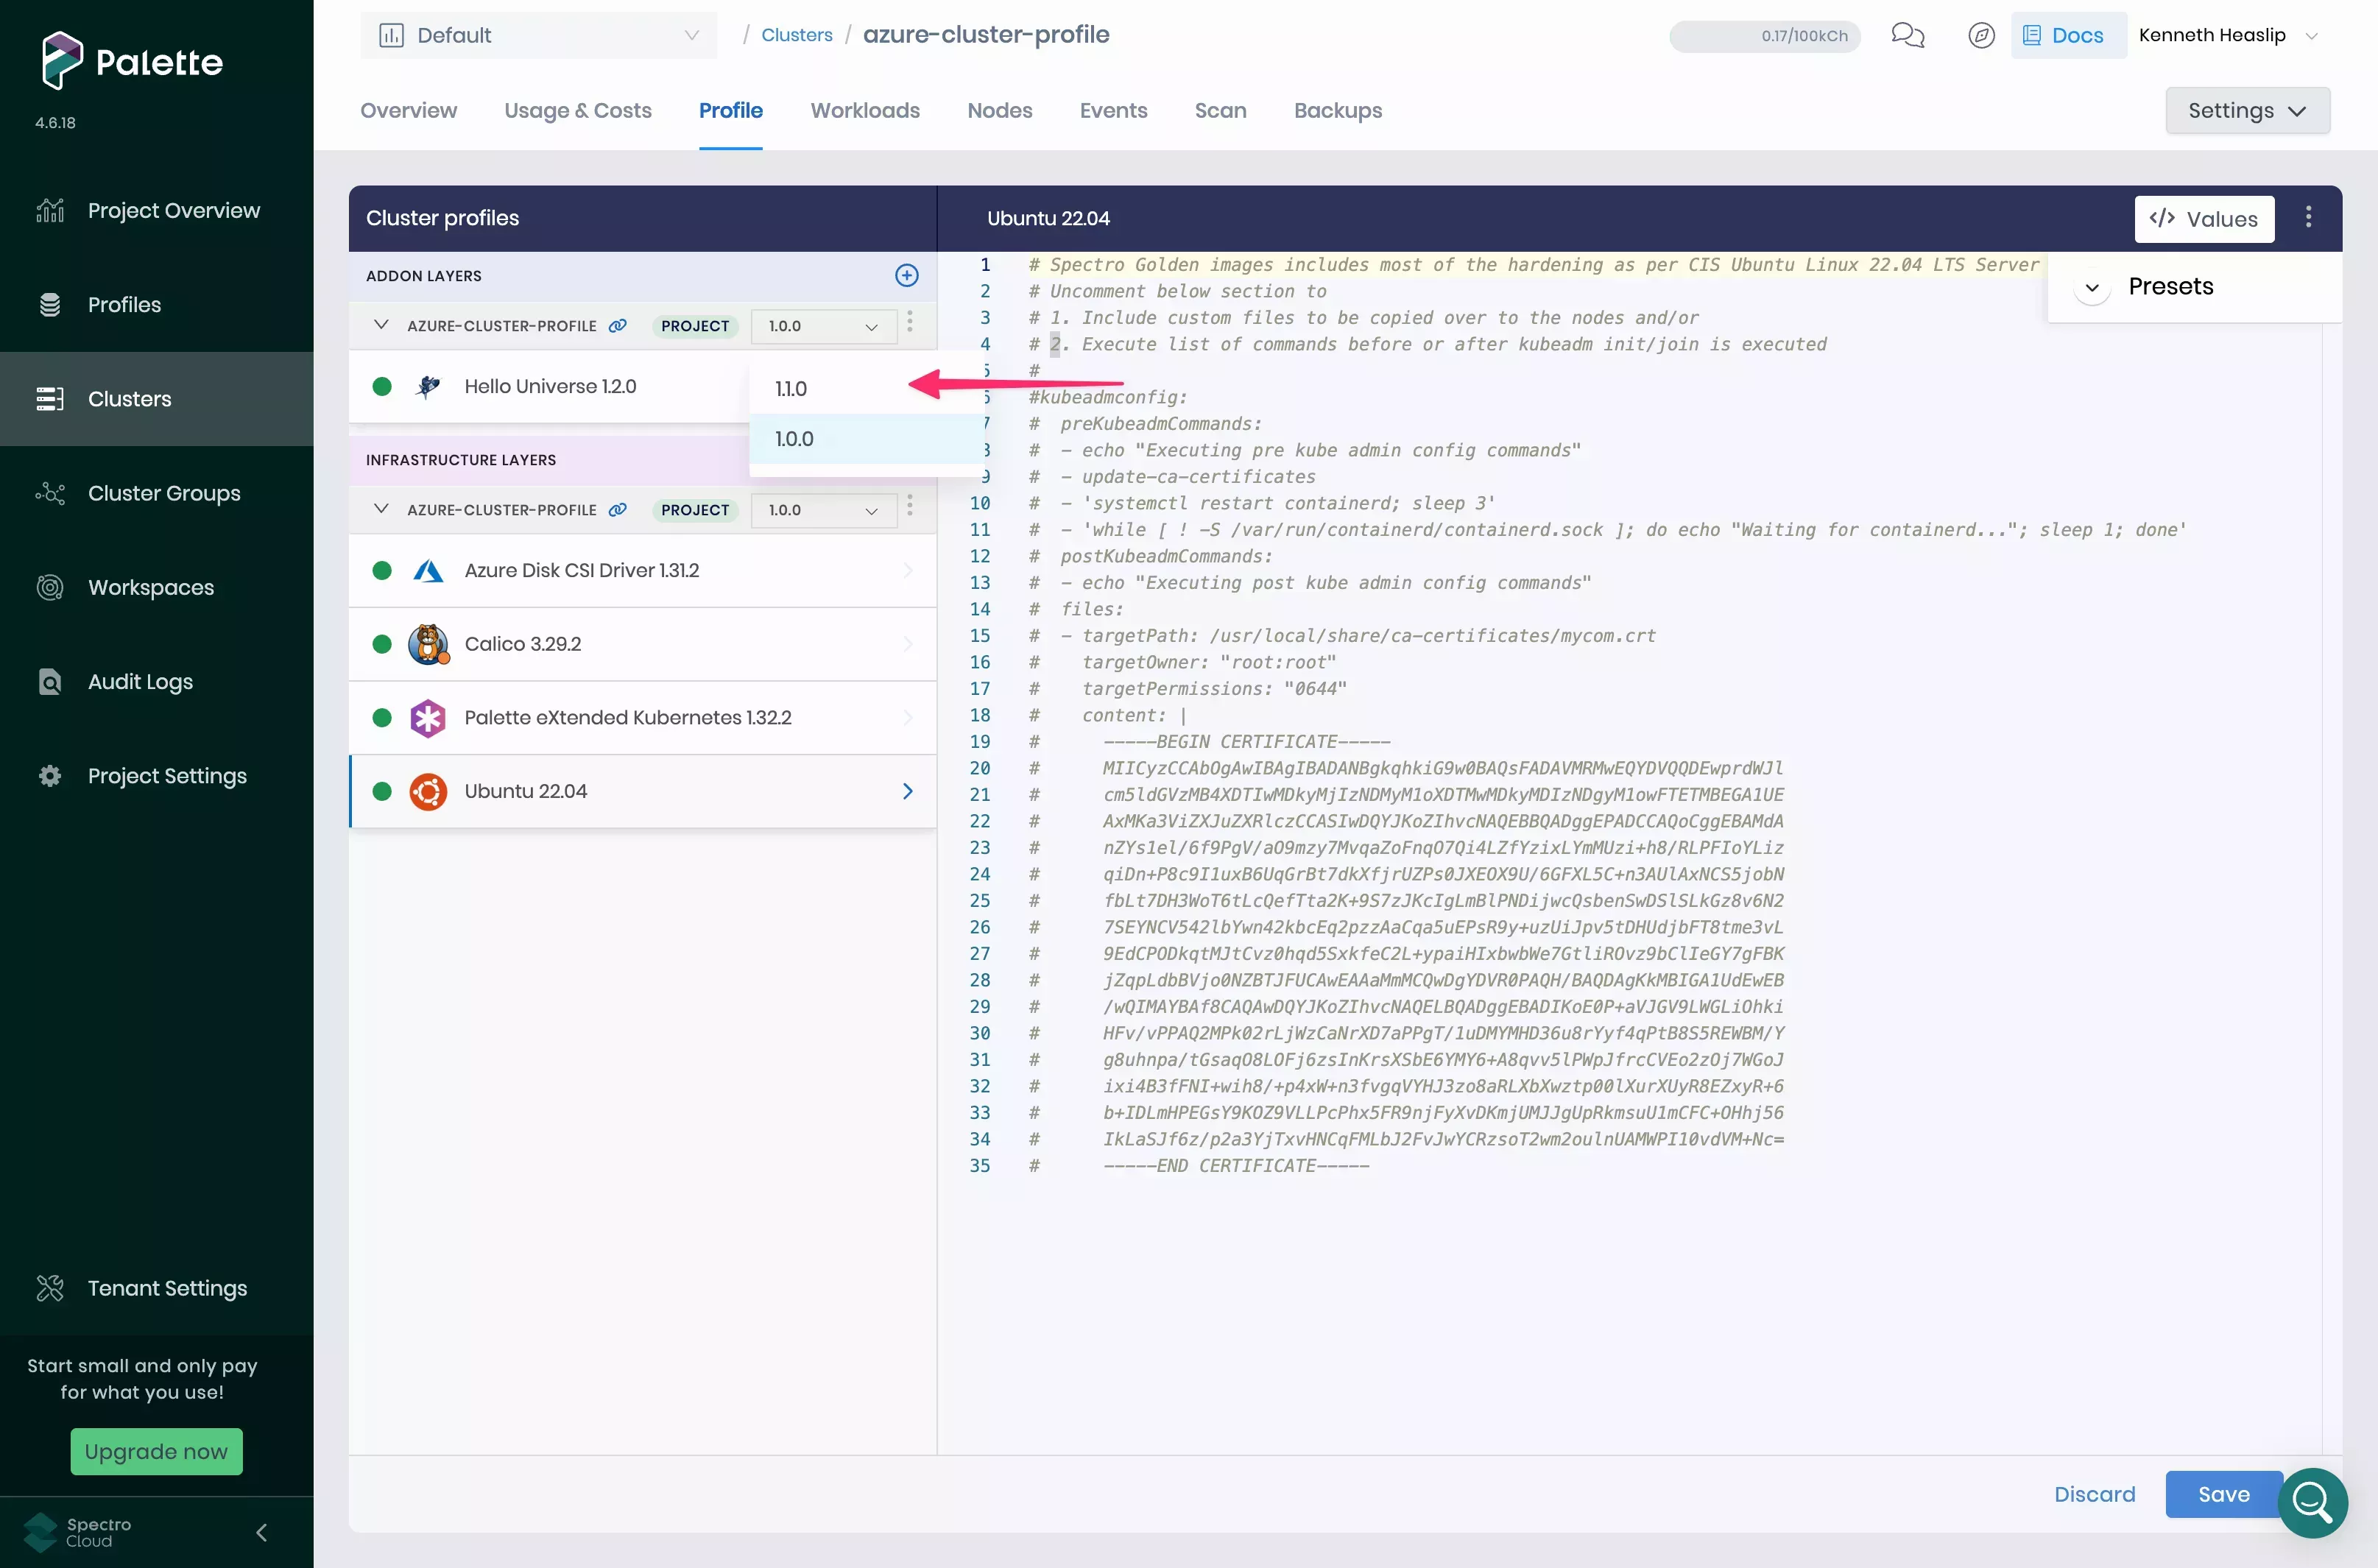
Select the Profile tab. This cluster is currently deployed using cluster profile version 1.0.0. Select the option 1.1.0 in the version drop-down menu. The Kubecost pack is now displayed in the profile pack list. Select Save to confirm your changes.
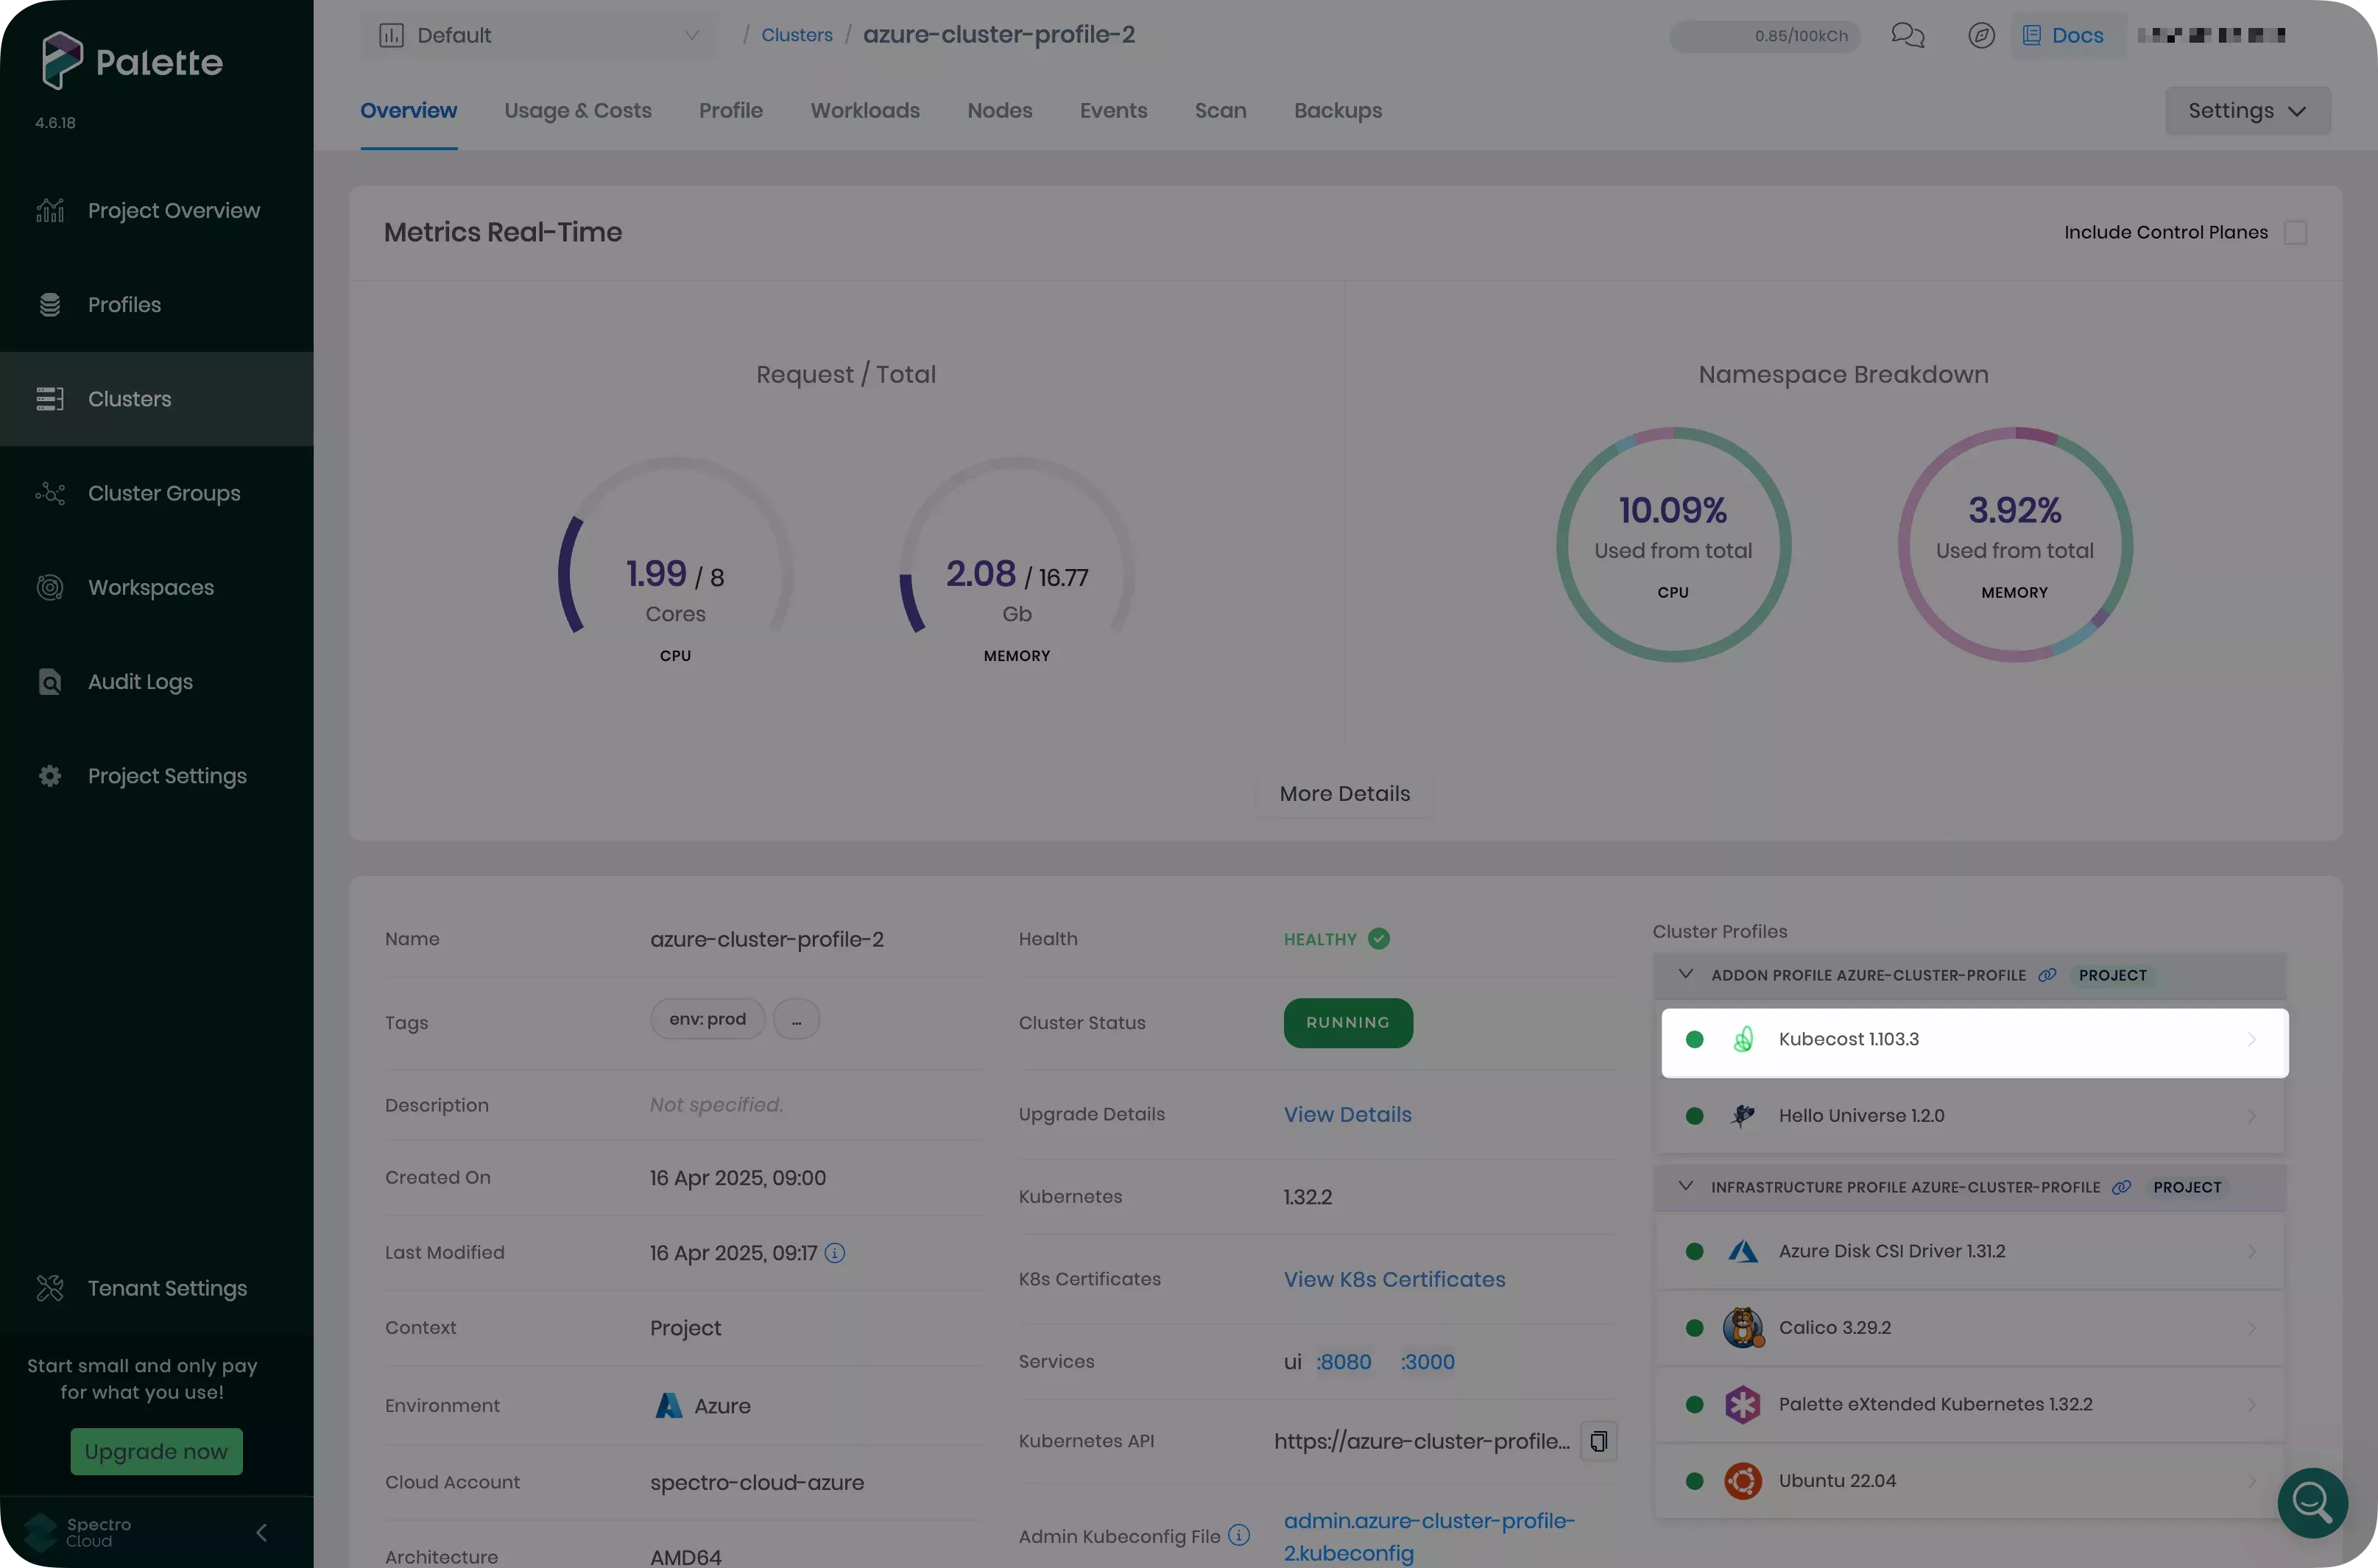
Palette now applies the configuration changes specified in version 1.1.0 of your cluster profile. Once your changes are complete, Palette marks your layers with the green status indicator. Select the Overview tab to verify that the Kubecost pack was installed successfully.
The Kubecost pack is not automatically accessible. To access the Kubecost UI, you must create a port forward to access the application deployed in the Kubernetes cluster.
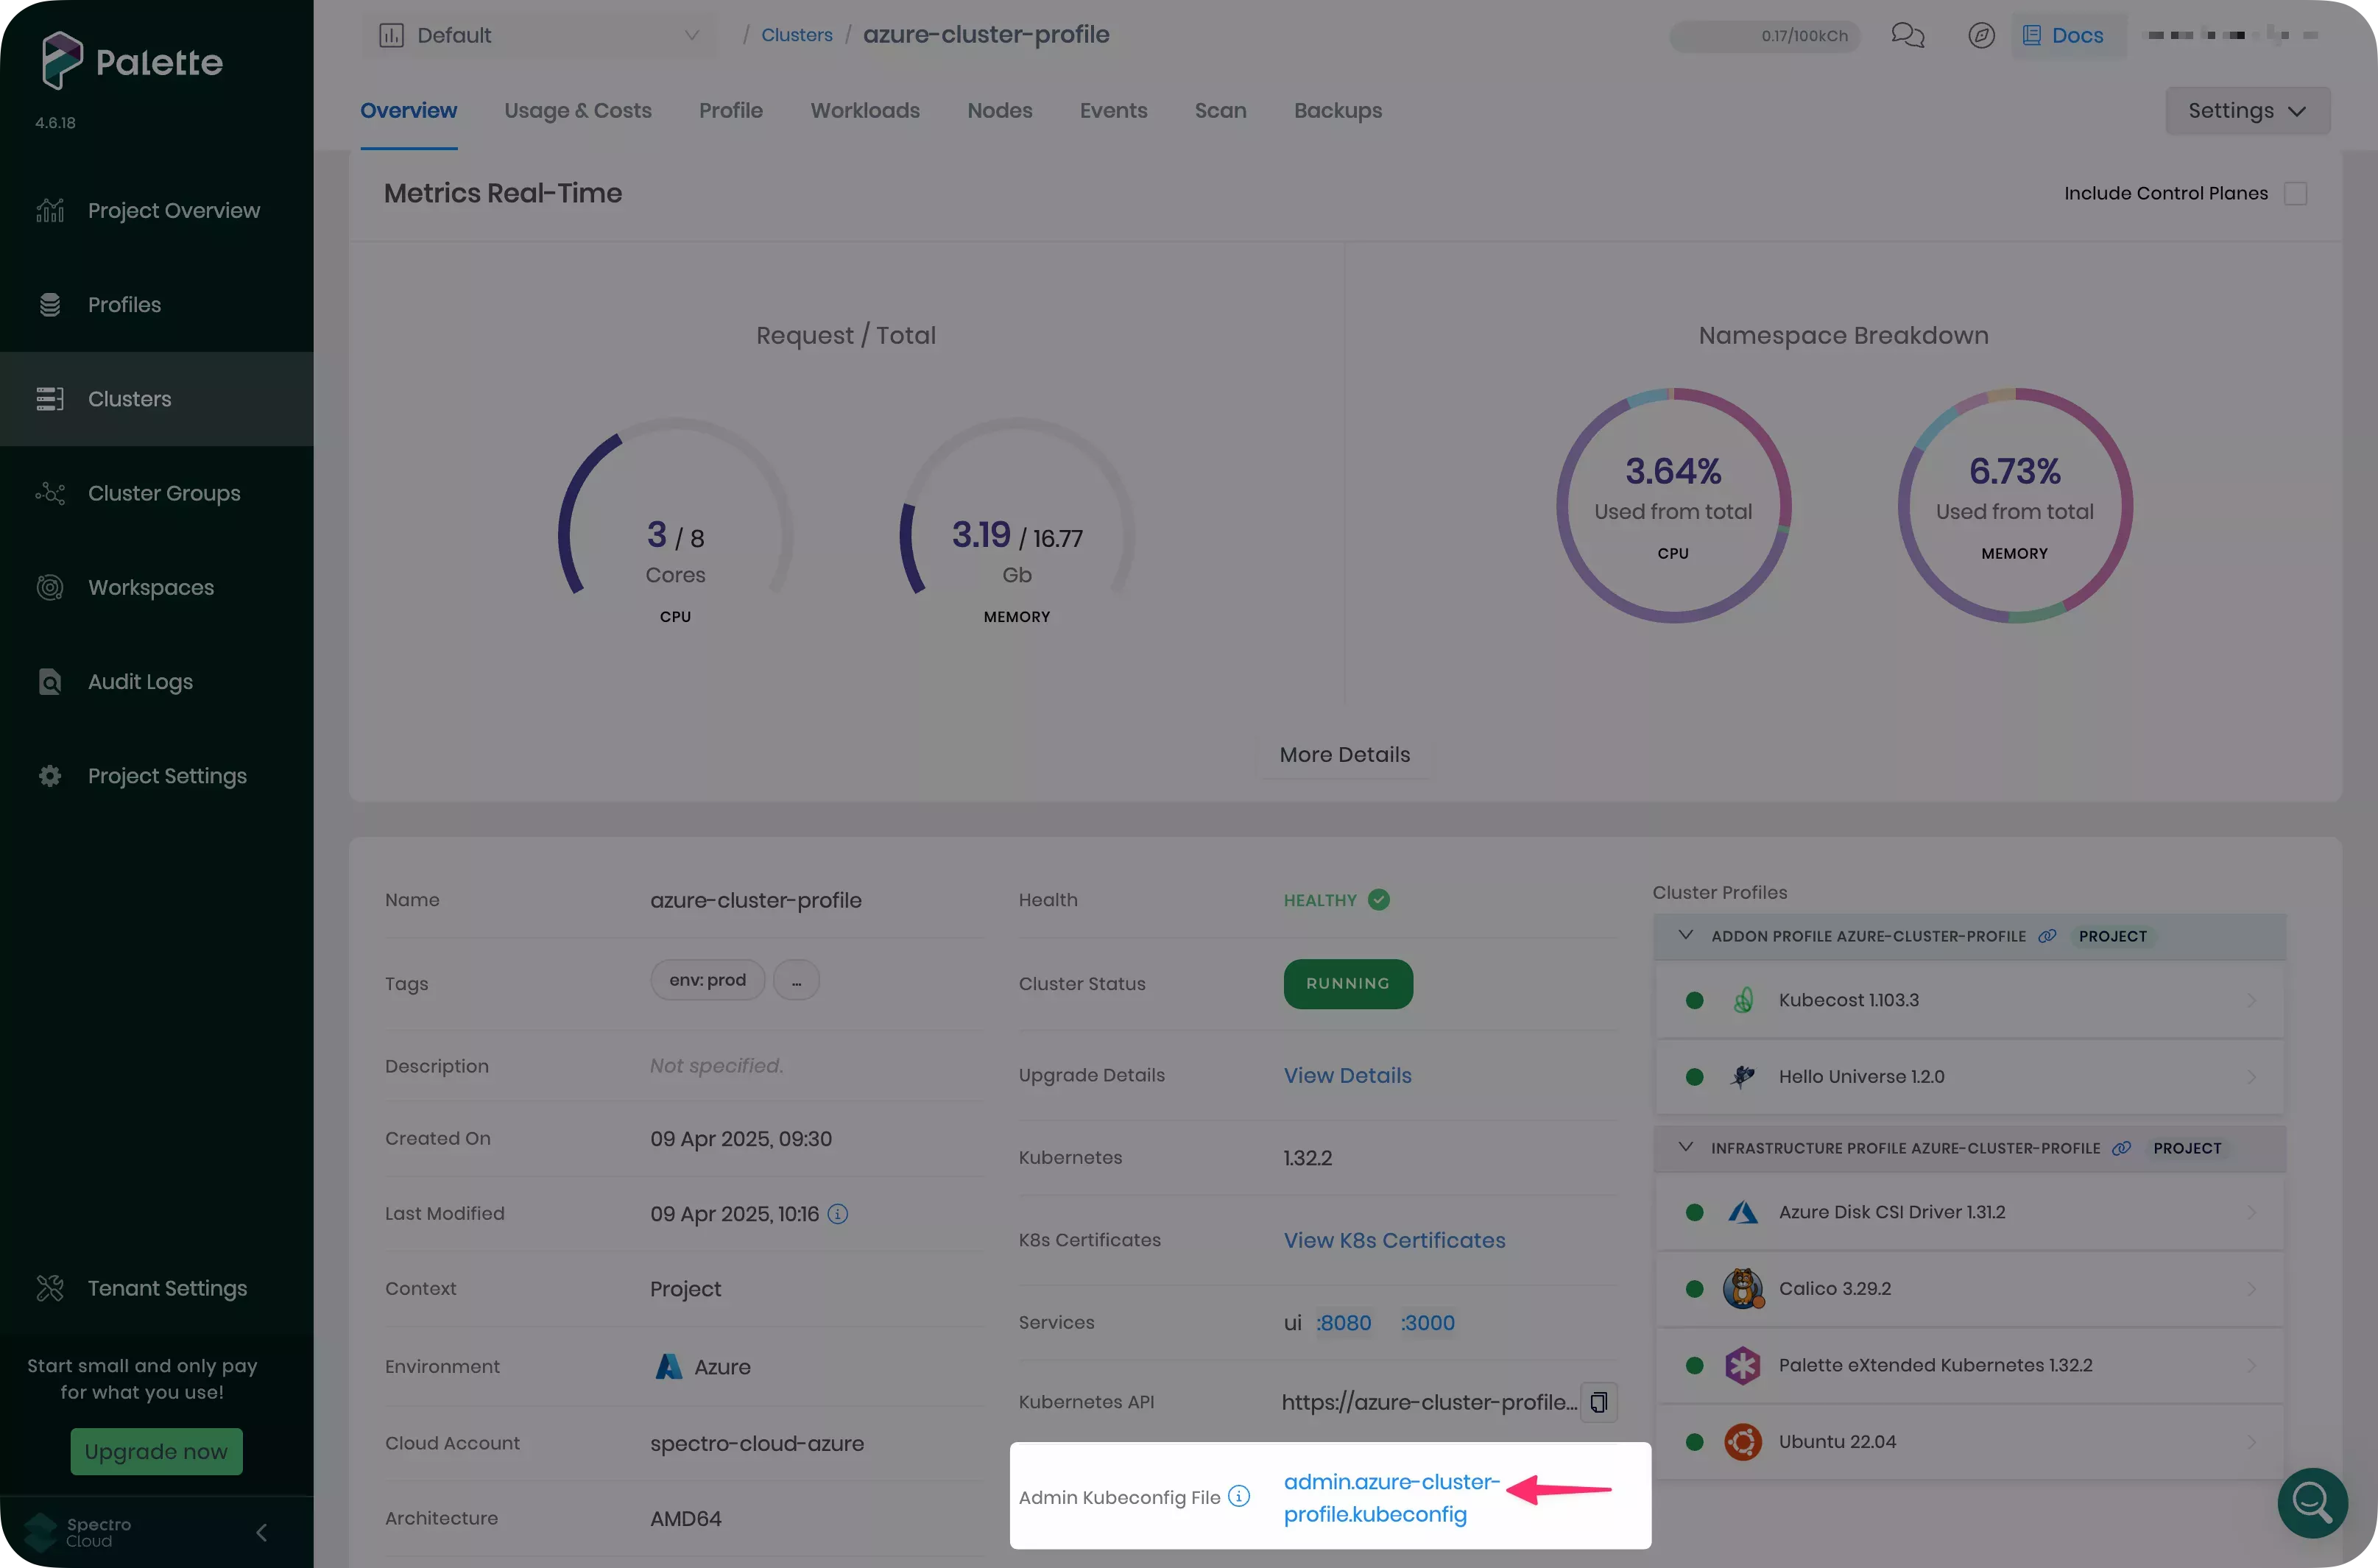
Download the kubeconfig file for your cluster from the Palette UI. This file enables you to issue kubectl commands against the host cluster.
Open a new terminal window and set the KUBECONFIG environment variable to use the kubeconfig file you downloaded.
export KUBECONFIG=~/Downloads/admin.aws-cluster.kubeconfig
Execute the following command to forward the Kubecost UI port to your local network. If port 9090 is already in use, choose a different port number.
kubectl port-forward --namespace kubecost deployment/cost-analyzer-cost-analyzer 9090
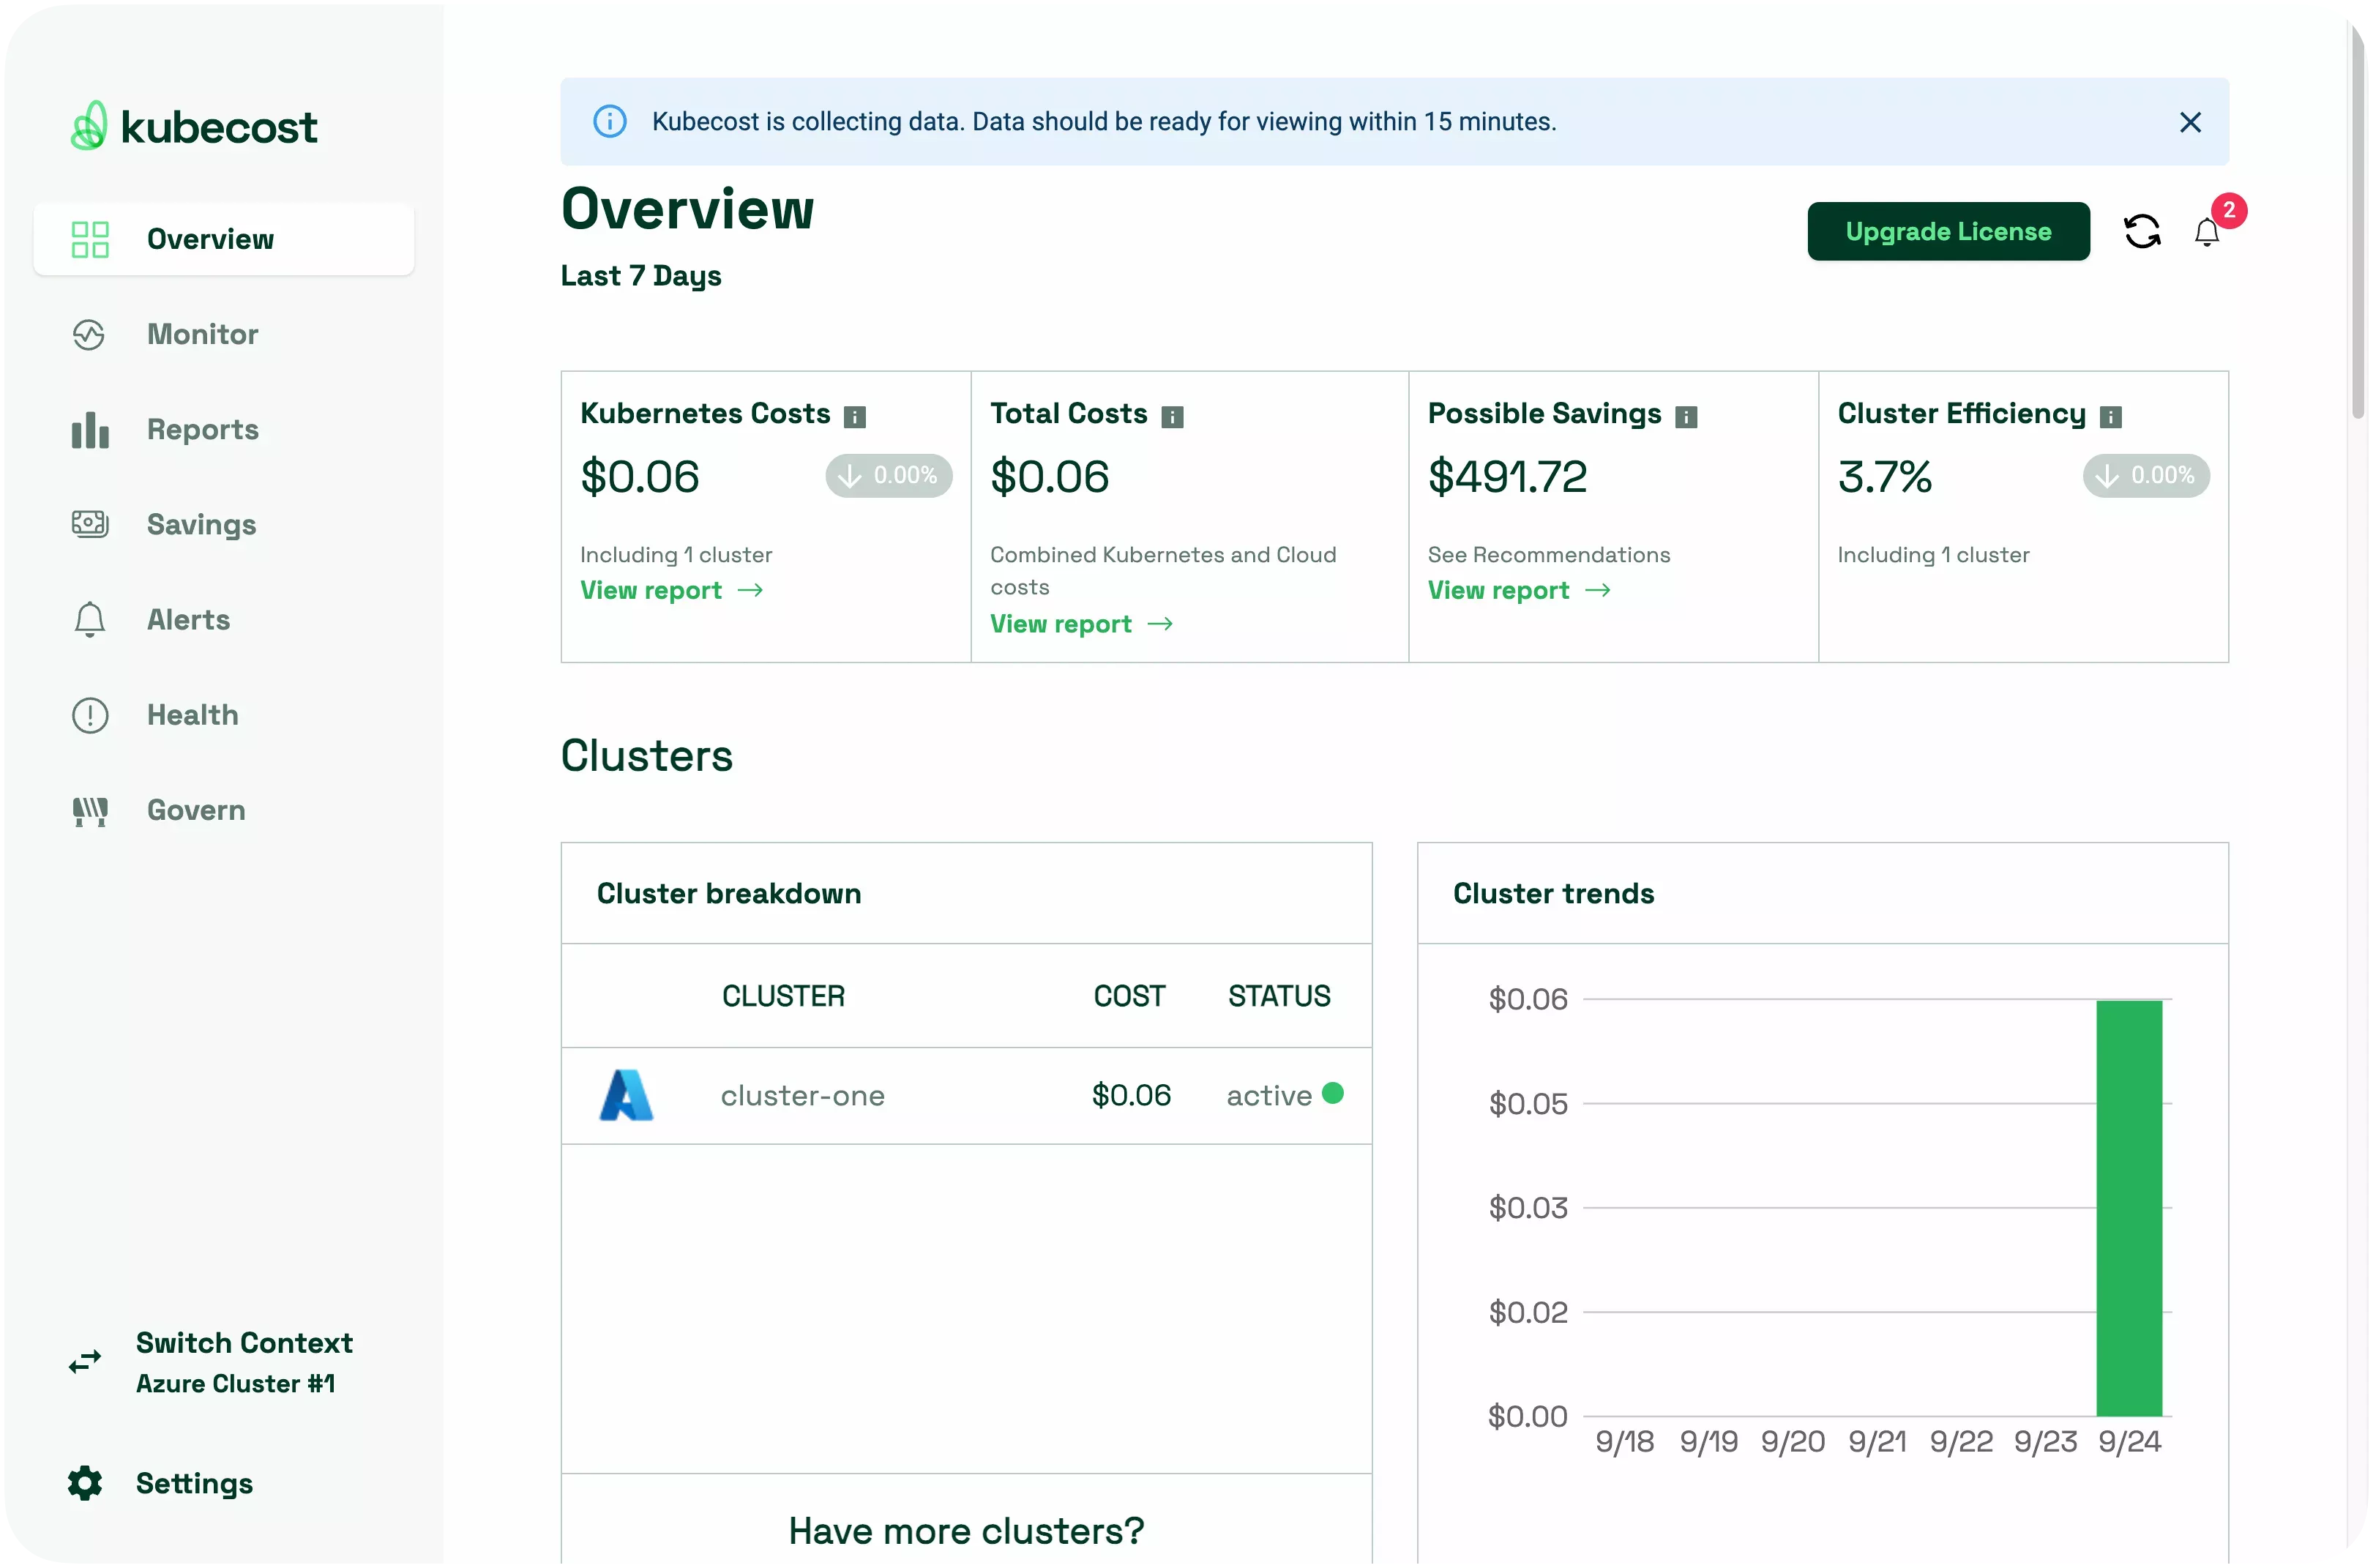
Open a browser window and navigate to http://localhost:9090.
Roll back Cluster Profiles
One of the key advantages of using cluster profile versions is that they make it possible to maintain a copy of previously known working states. The ability to roll back to a previously working cluster profile in one action shortens the time to recovery in the event of an incident.
The process to roll back to a previous version is identical to the process to apply a new version.
In Palette, navigate to the left main menu and select Clusters. Select the cluster you created in the Getting Started tutorials.
Select the Profile tab. The cluster is currently deployed using cluster profile version 1.1.0. Select version 1.0.0 in the version drop-down menu. The Kubecost pack is no longer displayed in the profile pack list. Select Save to confirm your changes.
Palette now makes the changes required for the cluster to update the cluster to the configuration specified in version 1.0.0 of your cluster profile. When the changes complete successfully, Palette will mark your layers with a green status indicator. Select the Overview tab to verify that the Kubecost pack was successfully removed.
Execute the commands below in your terminal to verify the Kubecost pack and all configurations were removed entirely.
Confirm that all pods deployed in the kubecost namespace have been removed.
kubectl get pods --namespace kubecost
The command will return the below response, confirming all Kubecost pods have been removed.
No resources found in kubecost namespace.
Confirm the namespace created by the pack was removed by using the command below.
kubectl get --namespace kubecost
Your result should be the same as the one below.
Error from server (NotFound): namespaces "kubecost" not found
Cluster Profile Overrides
Cluster profiles can be updated and applied to one specific cluster. This method is referred to as a profile override. When using this method, the previous state of the cluster profile will not be saved and changes are only applied to the cluster you specify. All other clusters using the same cluster profile and version will not be impacted.
Navigate to the left main menu and select Clusters. Select the cluster you created in the Getting Started tutorials.
Select the Profile tab. Then, select the hello-universe pack. Change the value of the replicas field to 2.
Select Save. The editor closes.
Palette uses the profile override configuration you provided and begins making changes immediately. Select the Overview tab and wait for the hello-universe deployment status to turn green.
Once these changes are complete, select the Workloads tab. Then, select Namespaces and the hello-universe namespace.
Two replicas of the UI deployment are available instead of the one initially specified by your cluster profile. Palette may take some time to reconcile and detect the change. Select the refresh icon next to the time duration drop-down menu to force a refresh. Your override has been successfully applied.
In Place Cluster Profile Updates
Cluster profiles can be updated in place. When a profile version is updated, all clusters configured with the same version will display a notification that updates are available. Profile changes made using this method require user confirmation. This allows you to schedule the work around maintenance windows for each impacted cluster.
Navigate to the left main menu and select Profiles. Select the profile you created in the Getting Started tutorials.
Select 1.0.0 in the version drop-down menu.
Select the hello-universe manifest. The editor appears. Change the value of the replicas field to 3. Select
Confirm Updates. The editor closes.
Select Save Changes to confirm the changes you have made to your profile.
Navigate to the left main menu and select Clusters. Palette indicates clusters have updates pending by placing a green icon in the Type column.
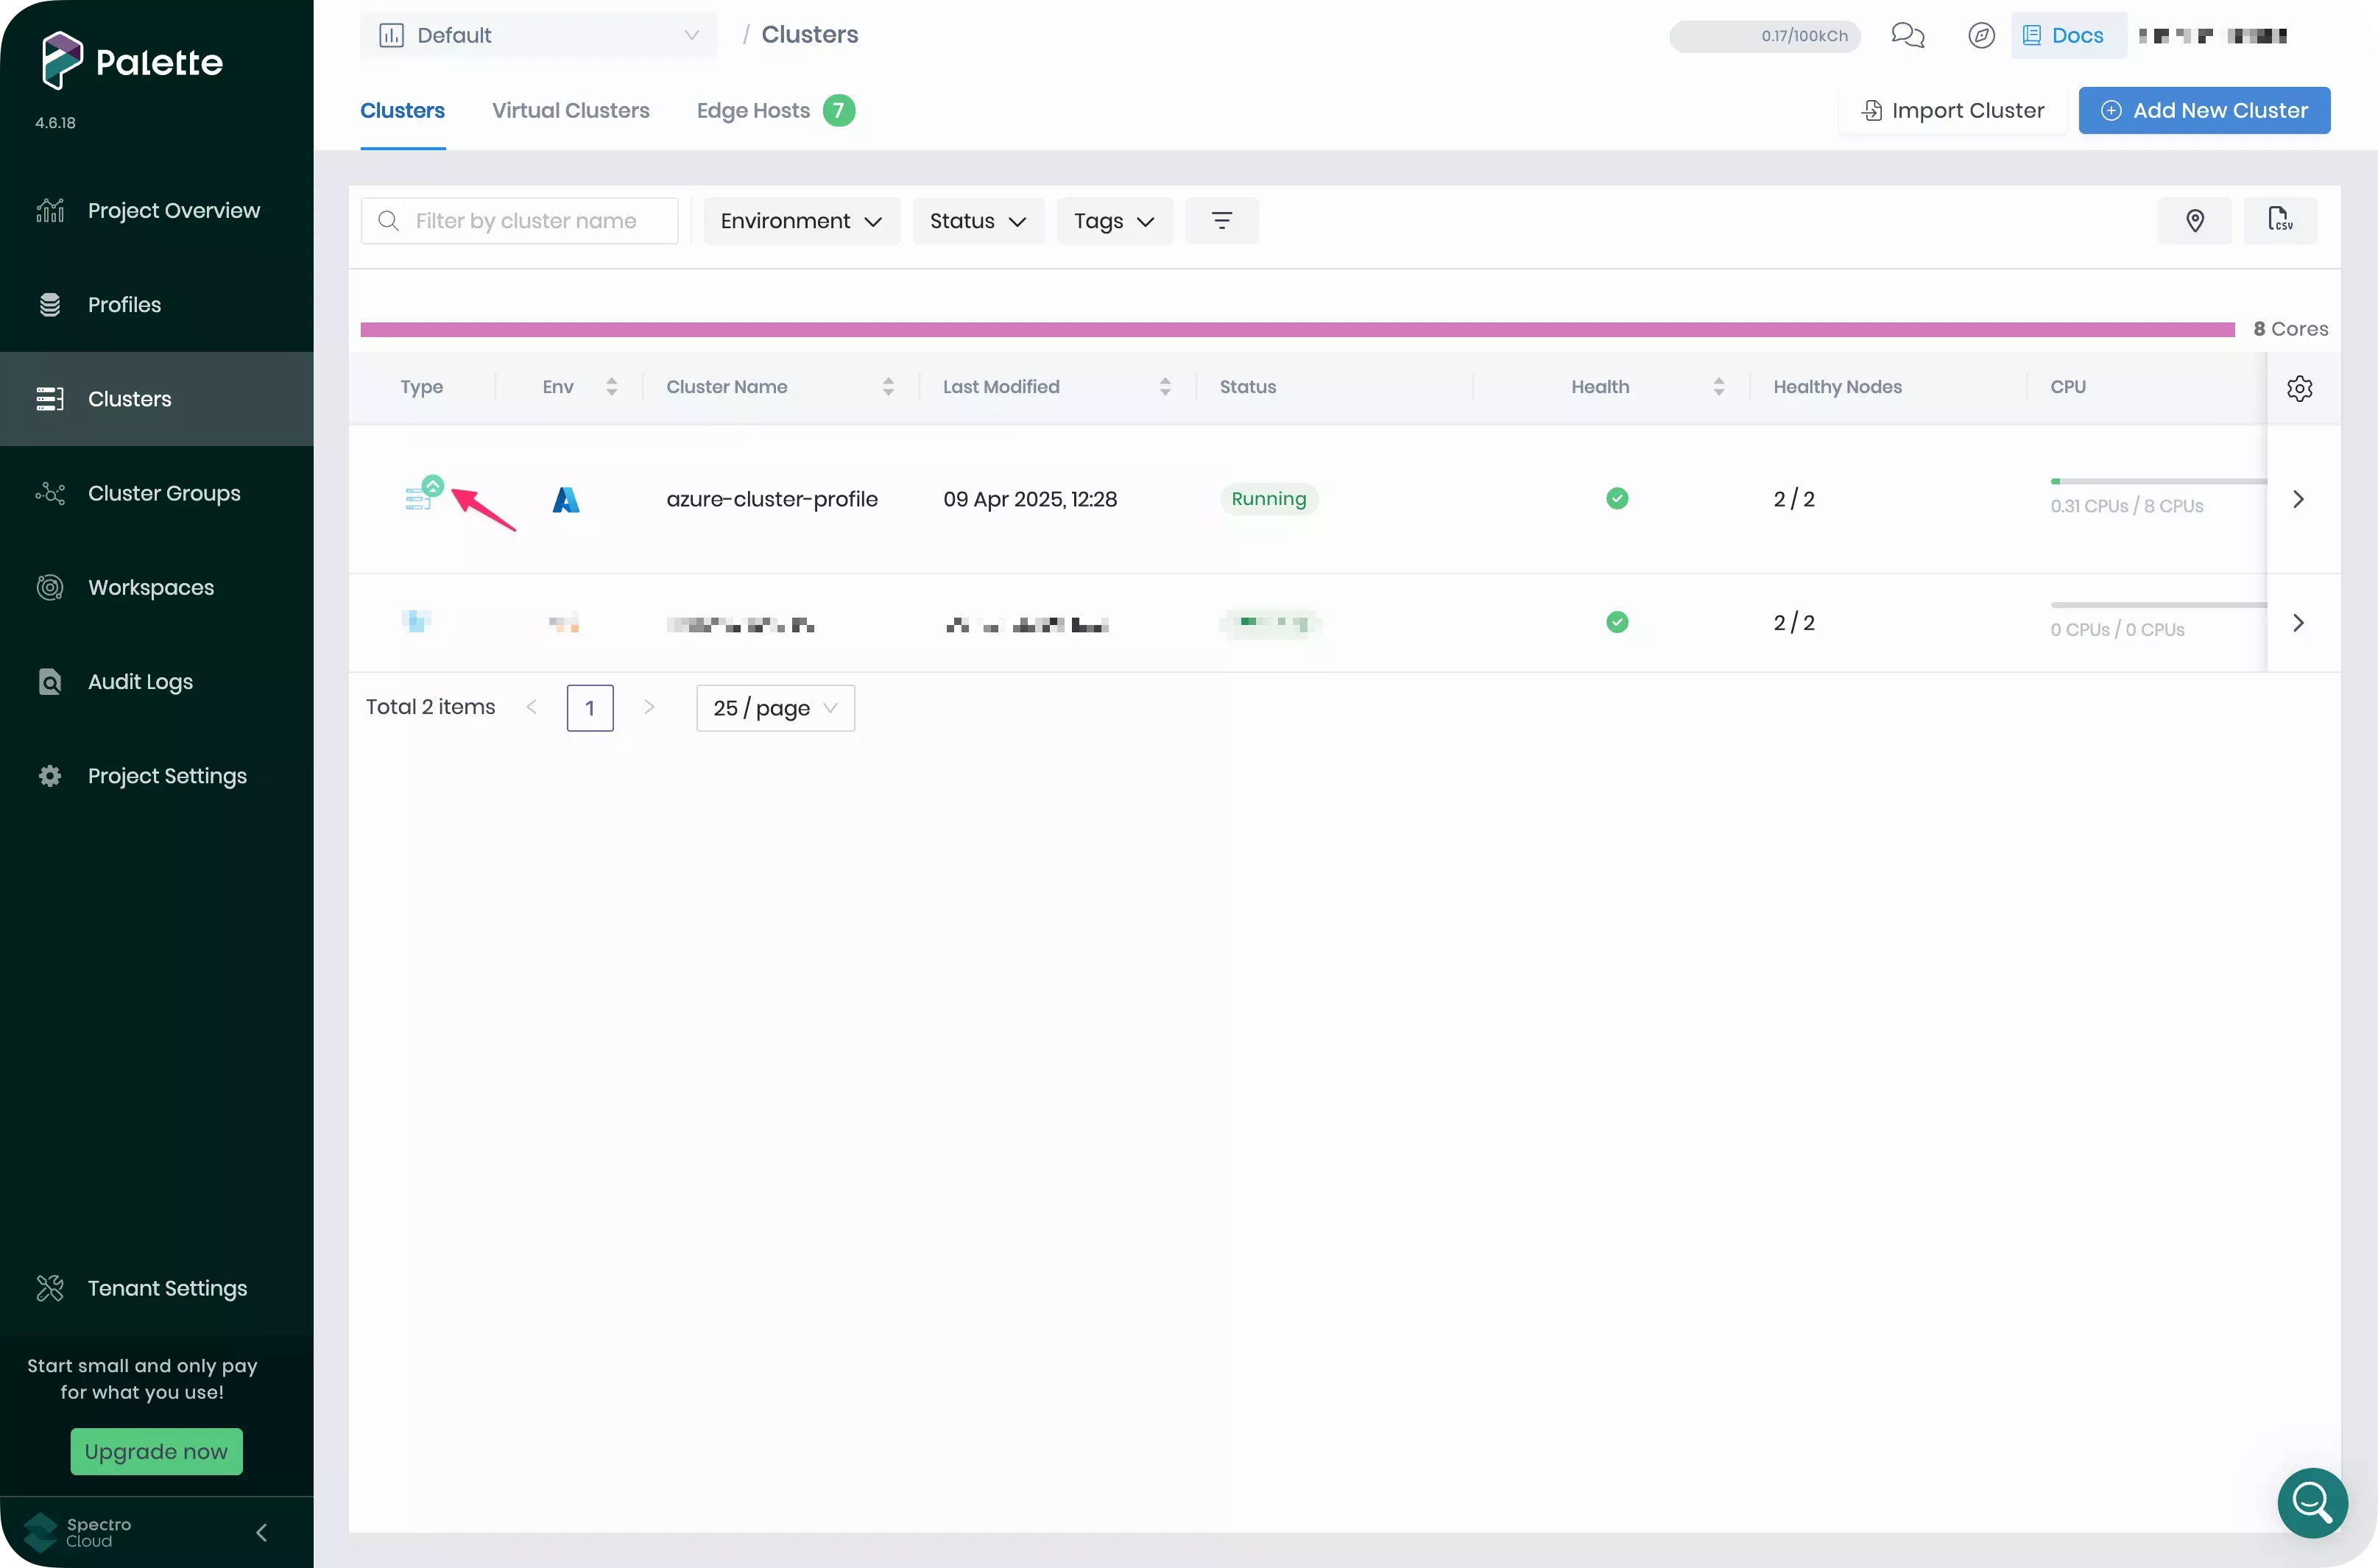
Select the cluster you created in the Getting Started tutorials. Select Updates to begin the cluster update.
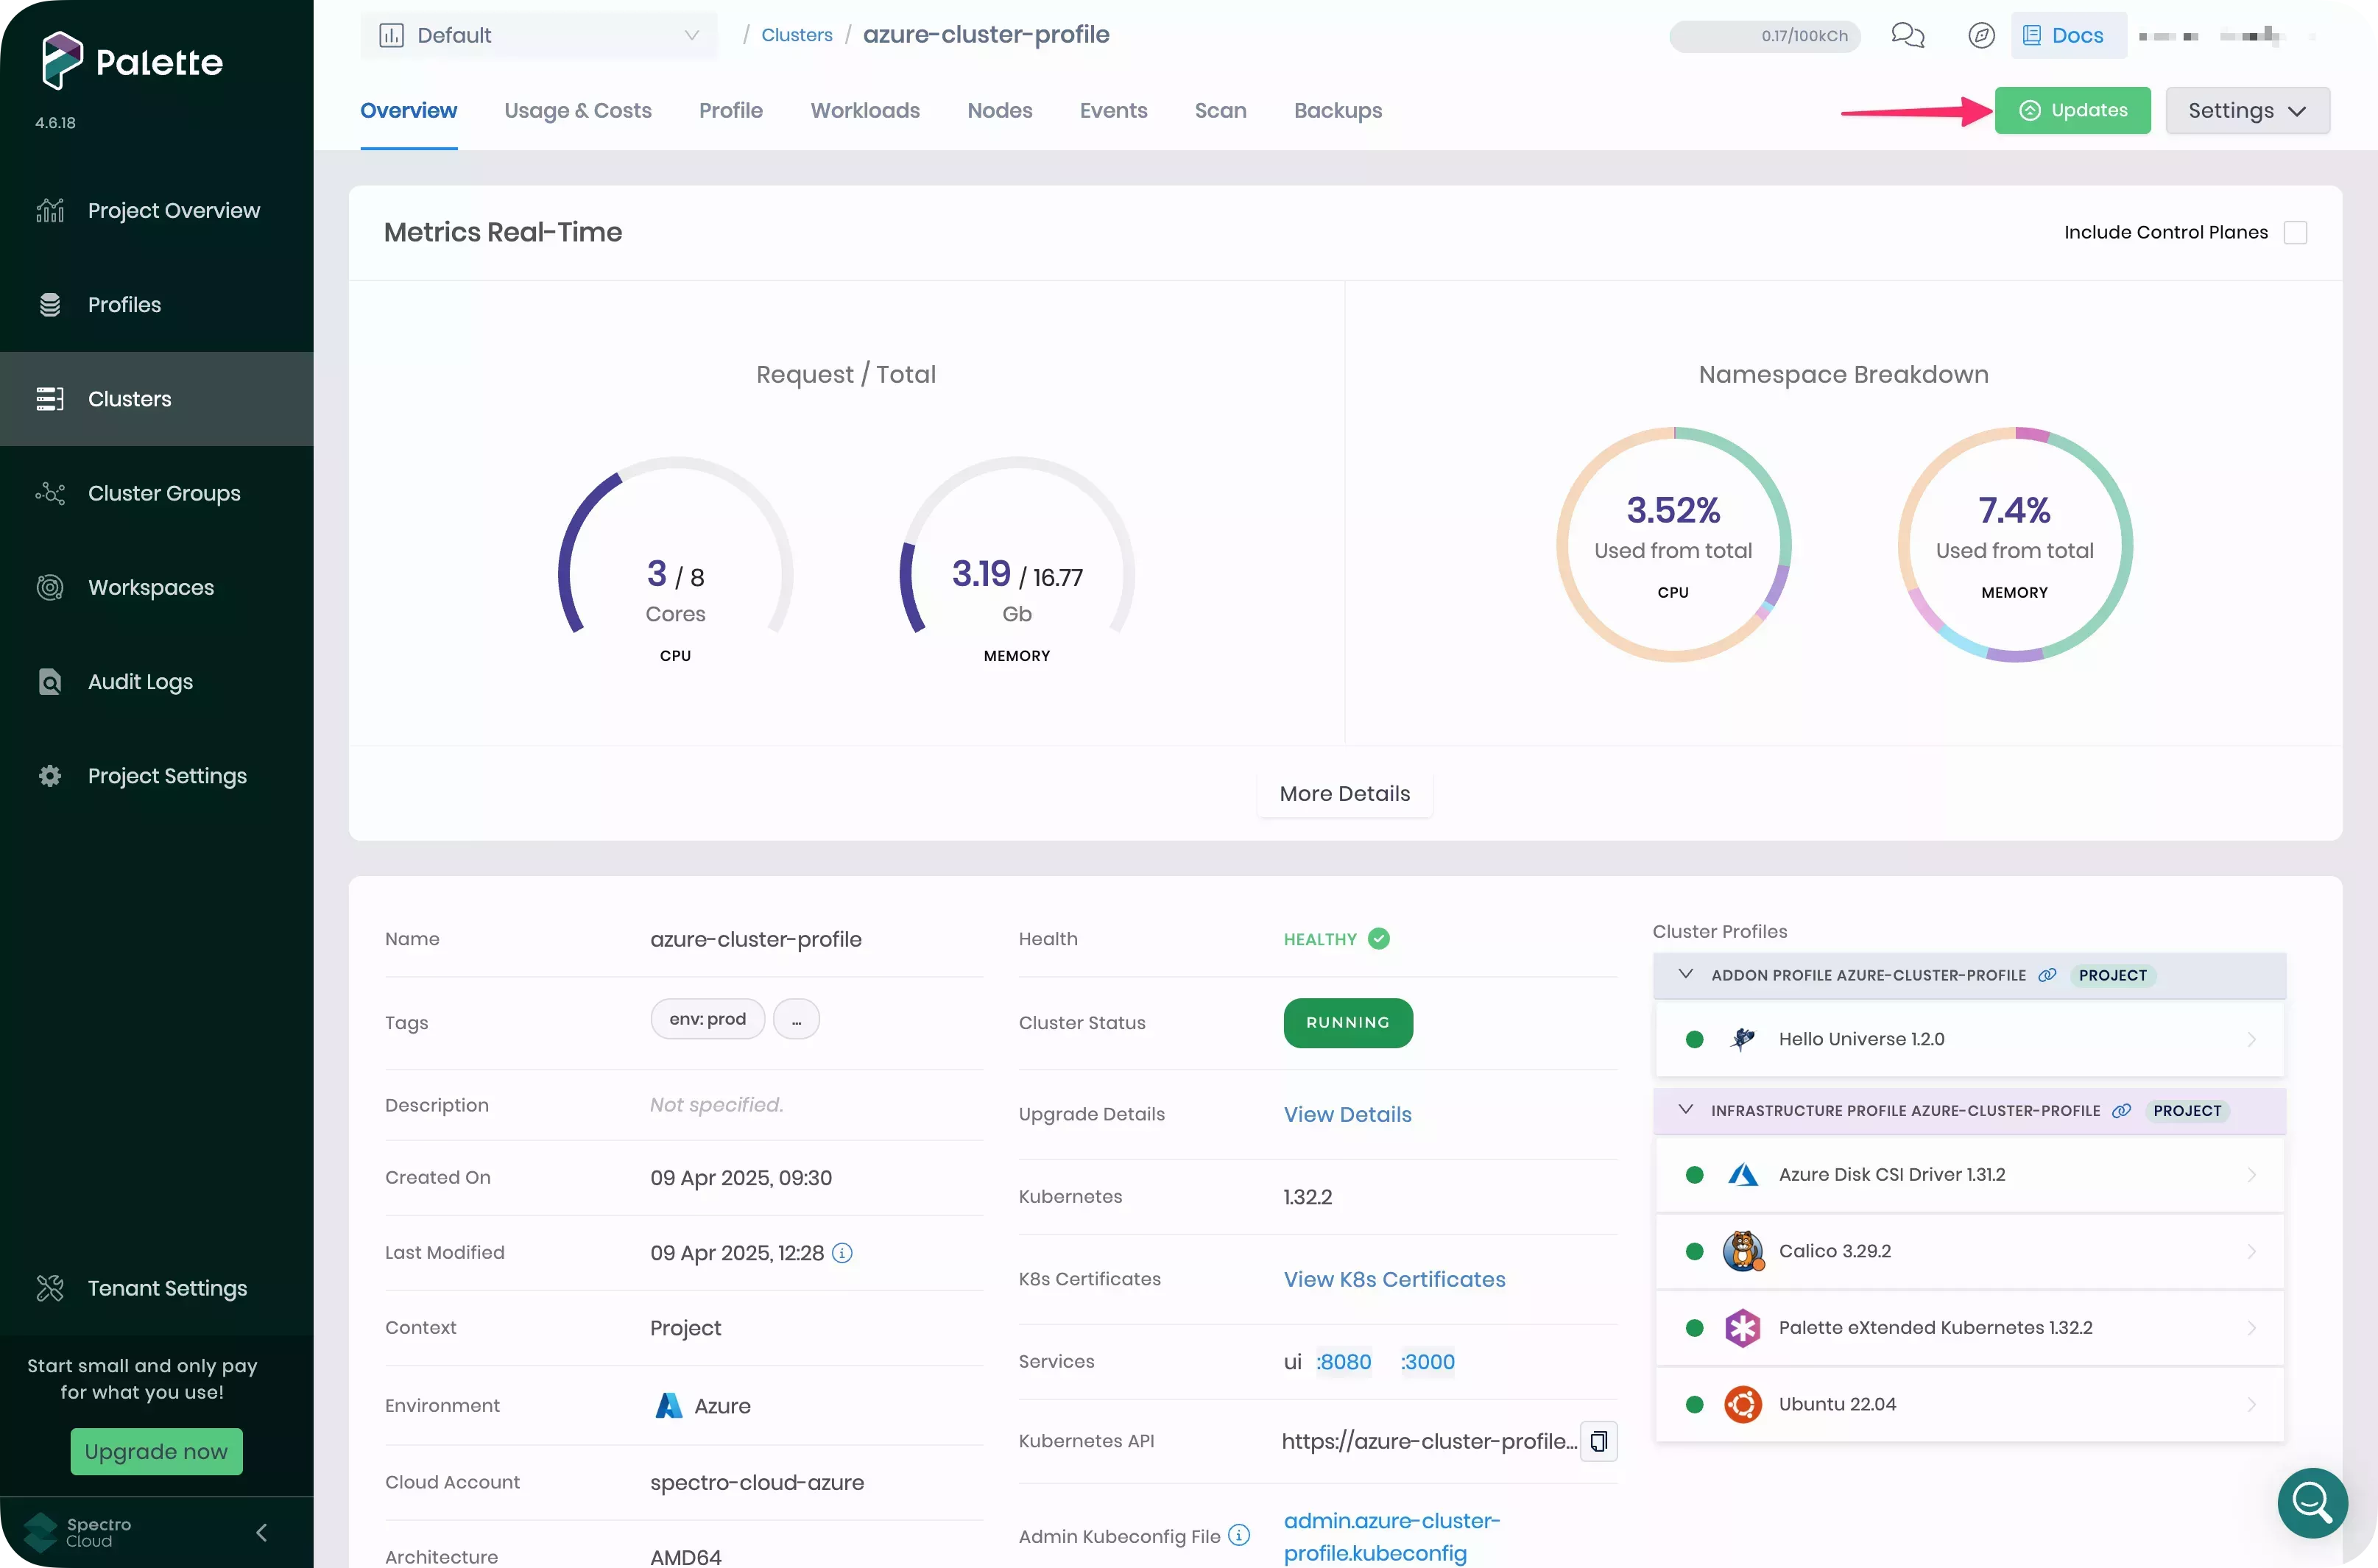
A dialog box appears that shows the packs with changes pending. Select Review Changes in Editor.
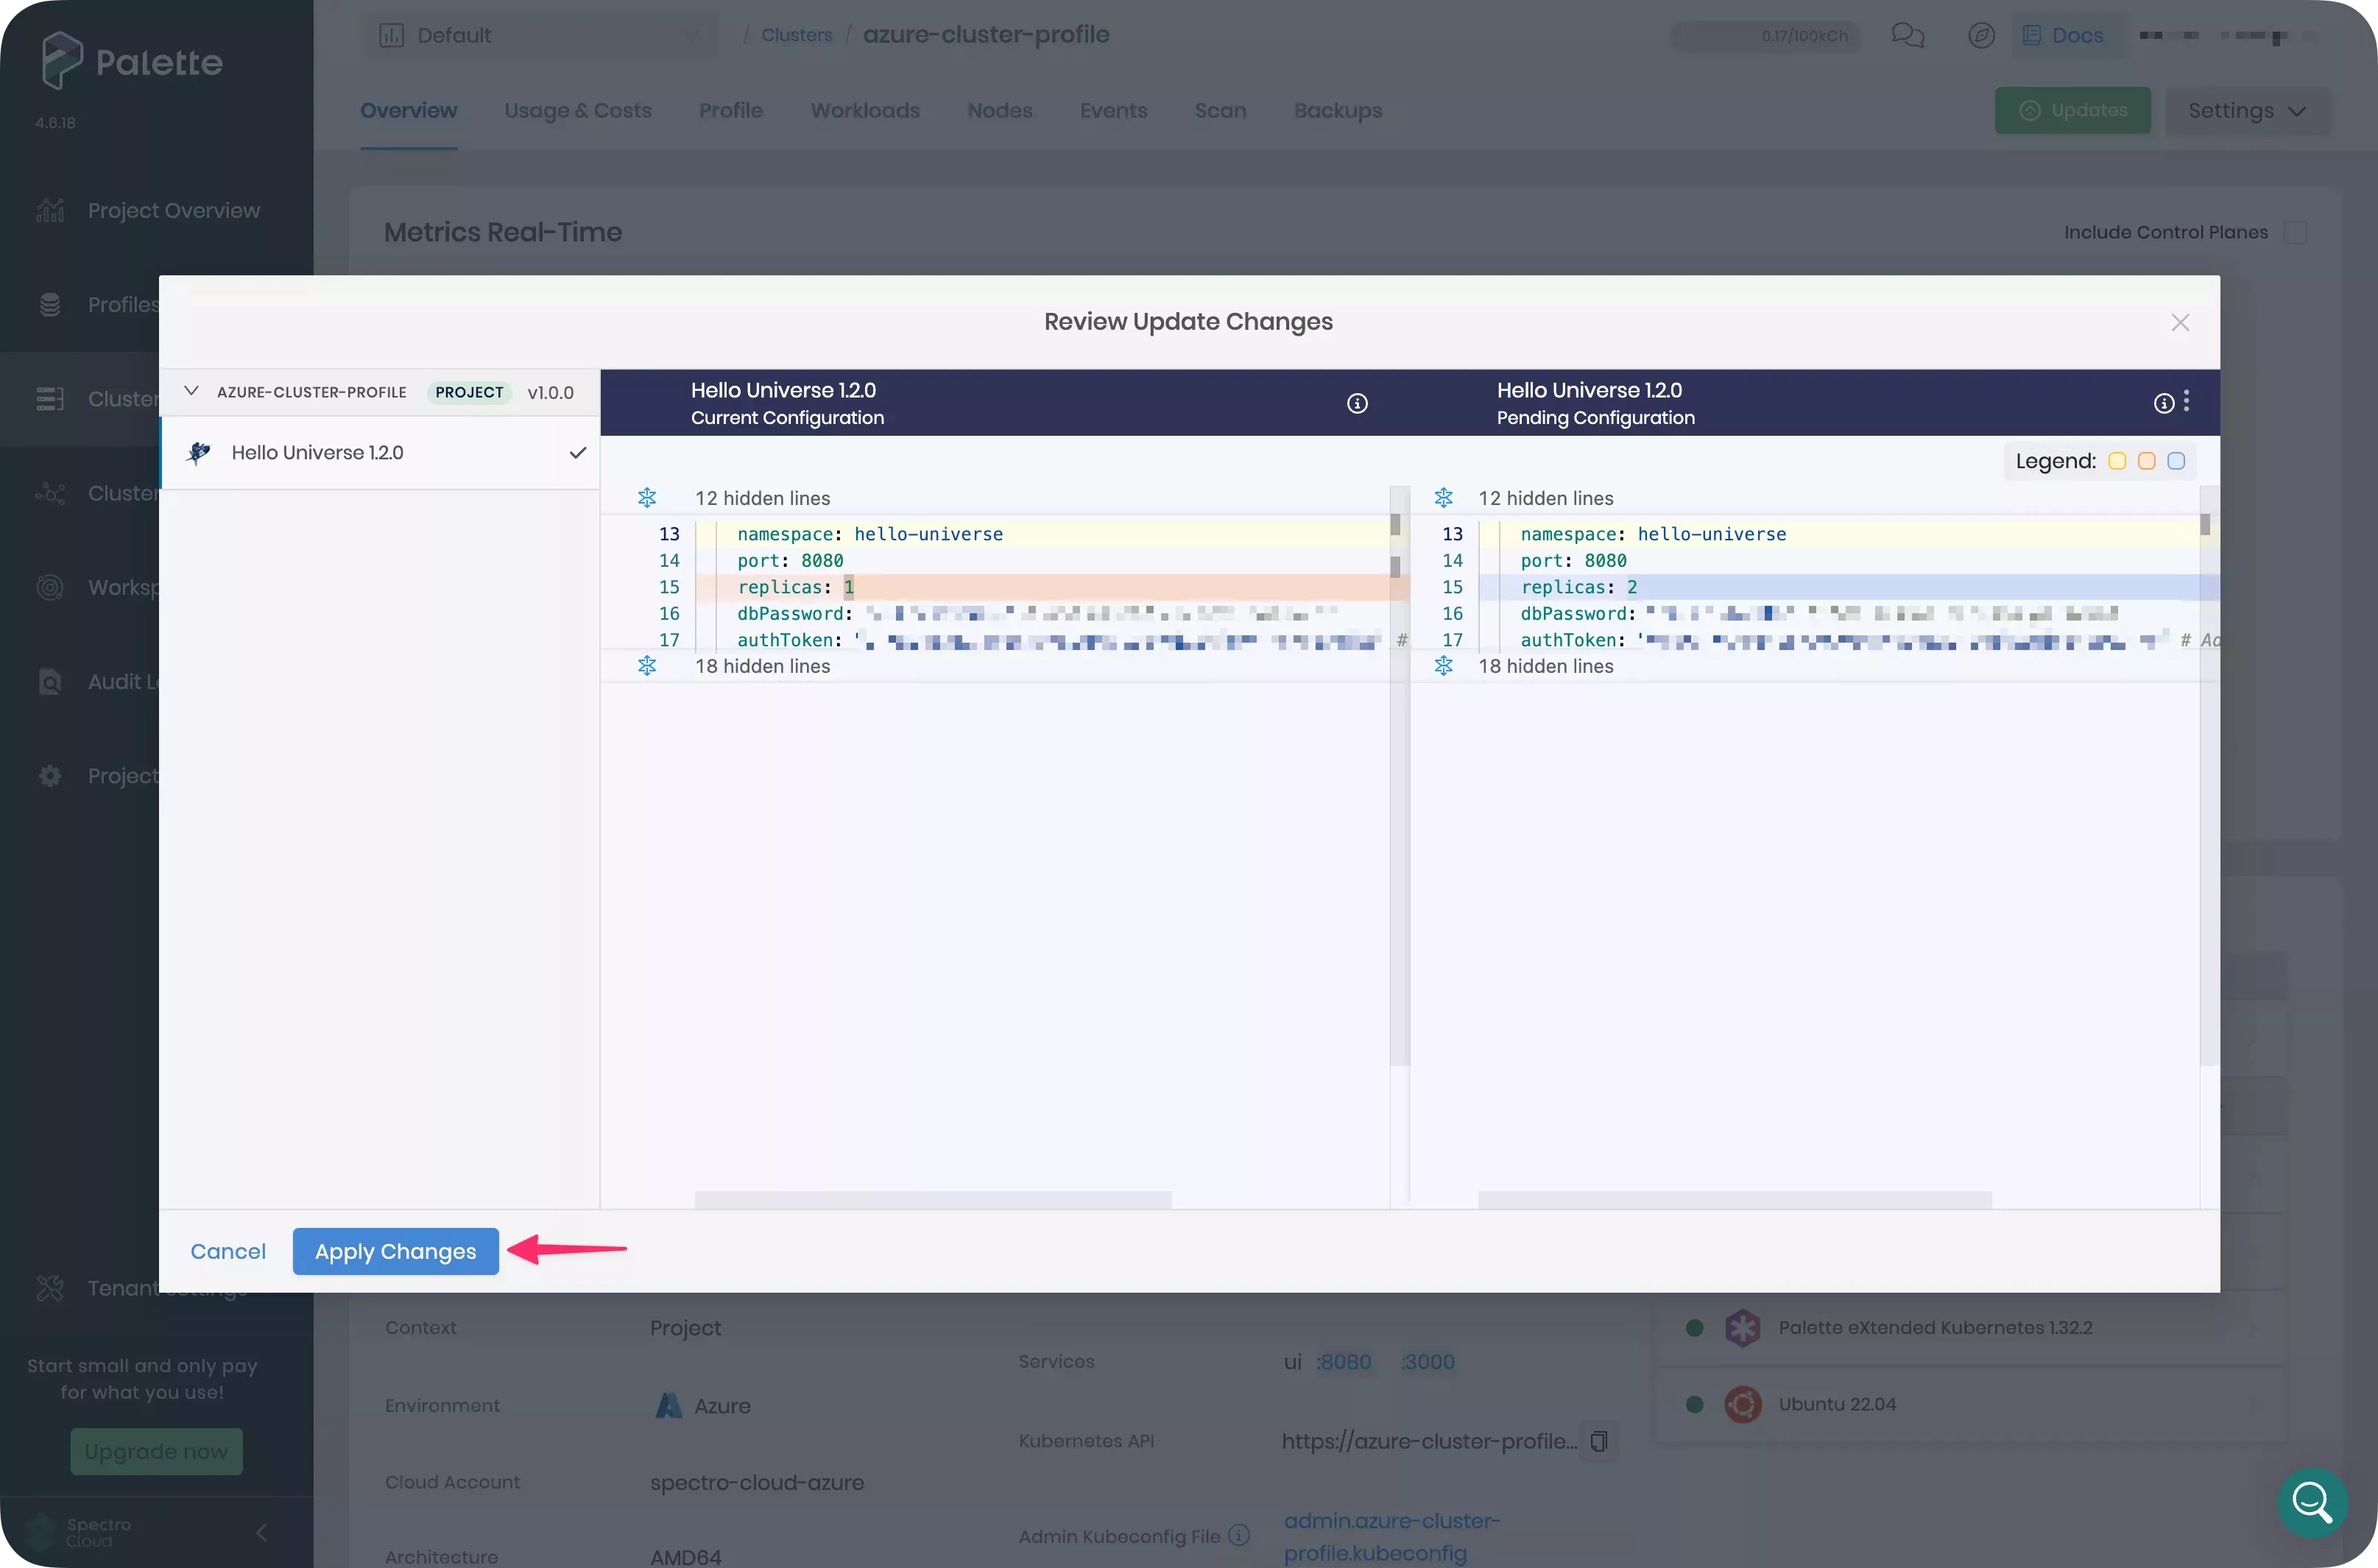
Palette displays the details of the pending changes, with the current configuration on the left and the incoming configuration on the right.
Review the changes and ensure the replicas field value is the only change. You can choose to apply the modified
profile by selecting Apply Changes or decline it by selecting Cancel.
Select Apply Changes once you have finished reviewing your changes.
You have just applied an updated profile to a cluster that had a profile override in place. When doing this, any configurations in the profile override will be replaced with those in the updated profile.
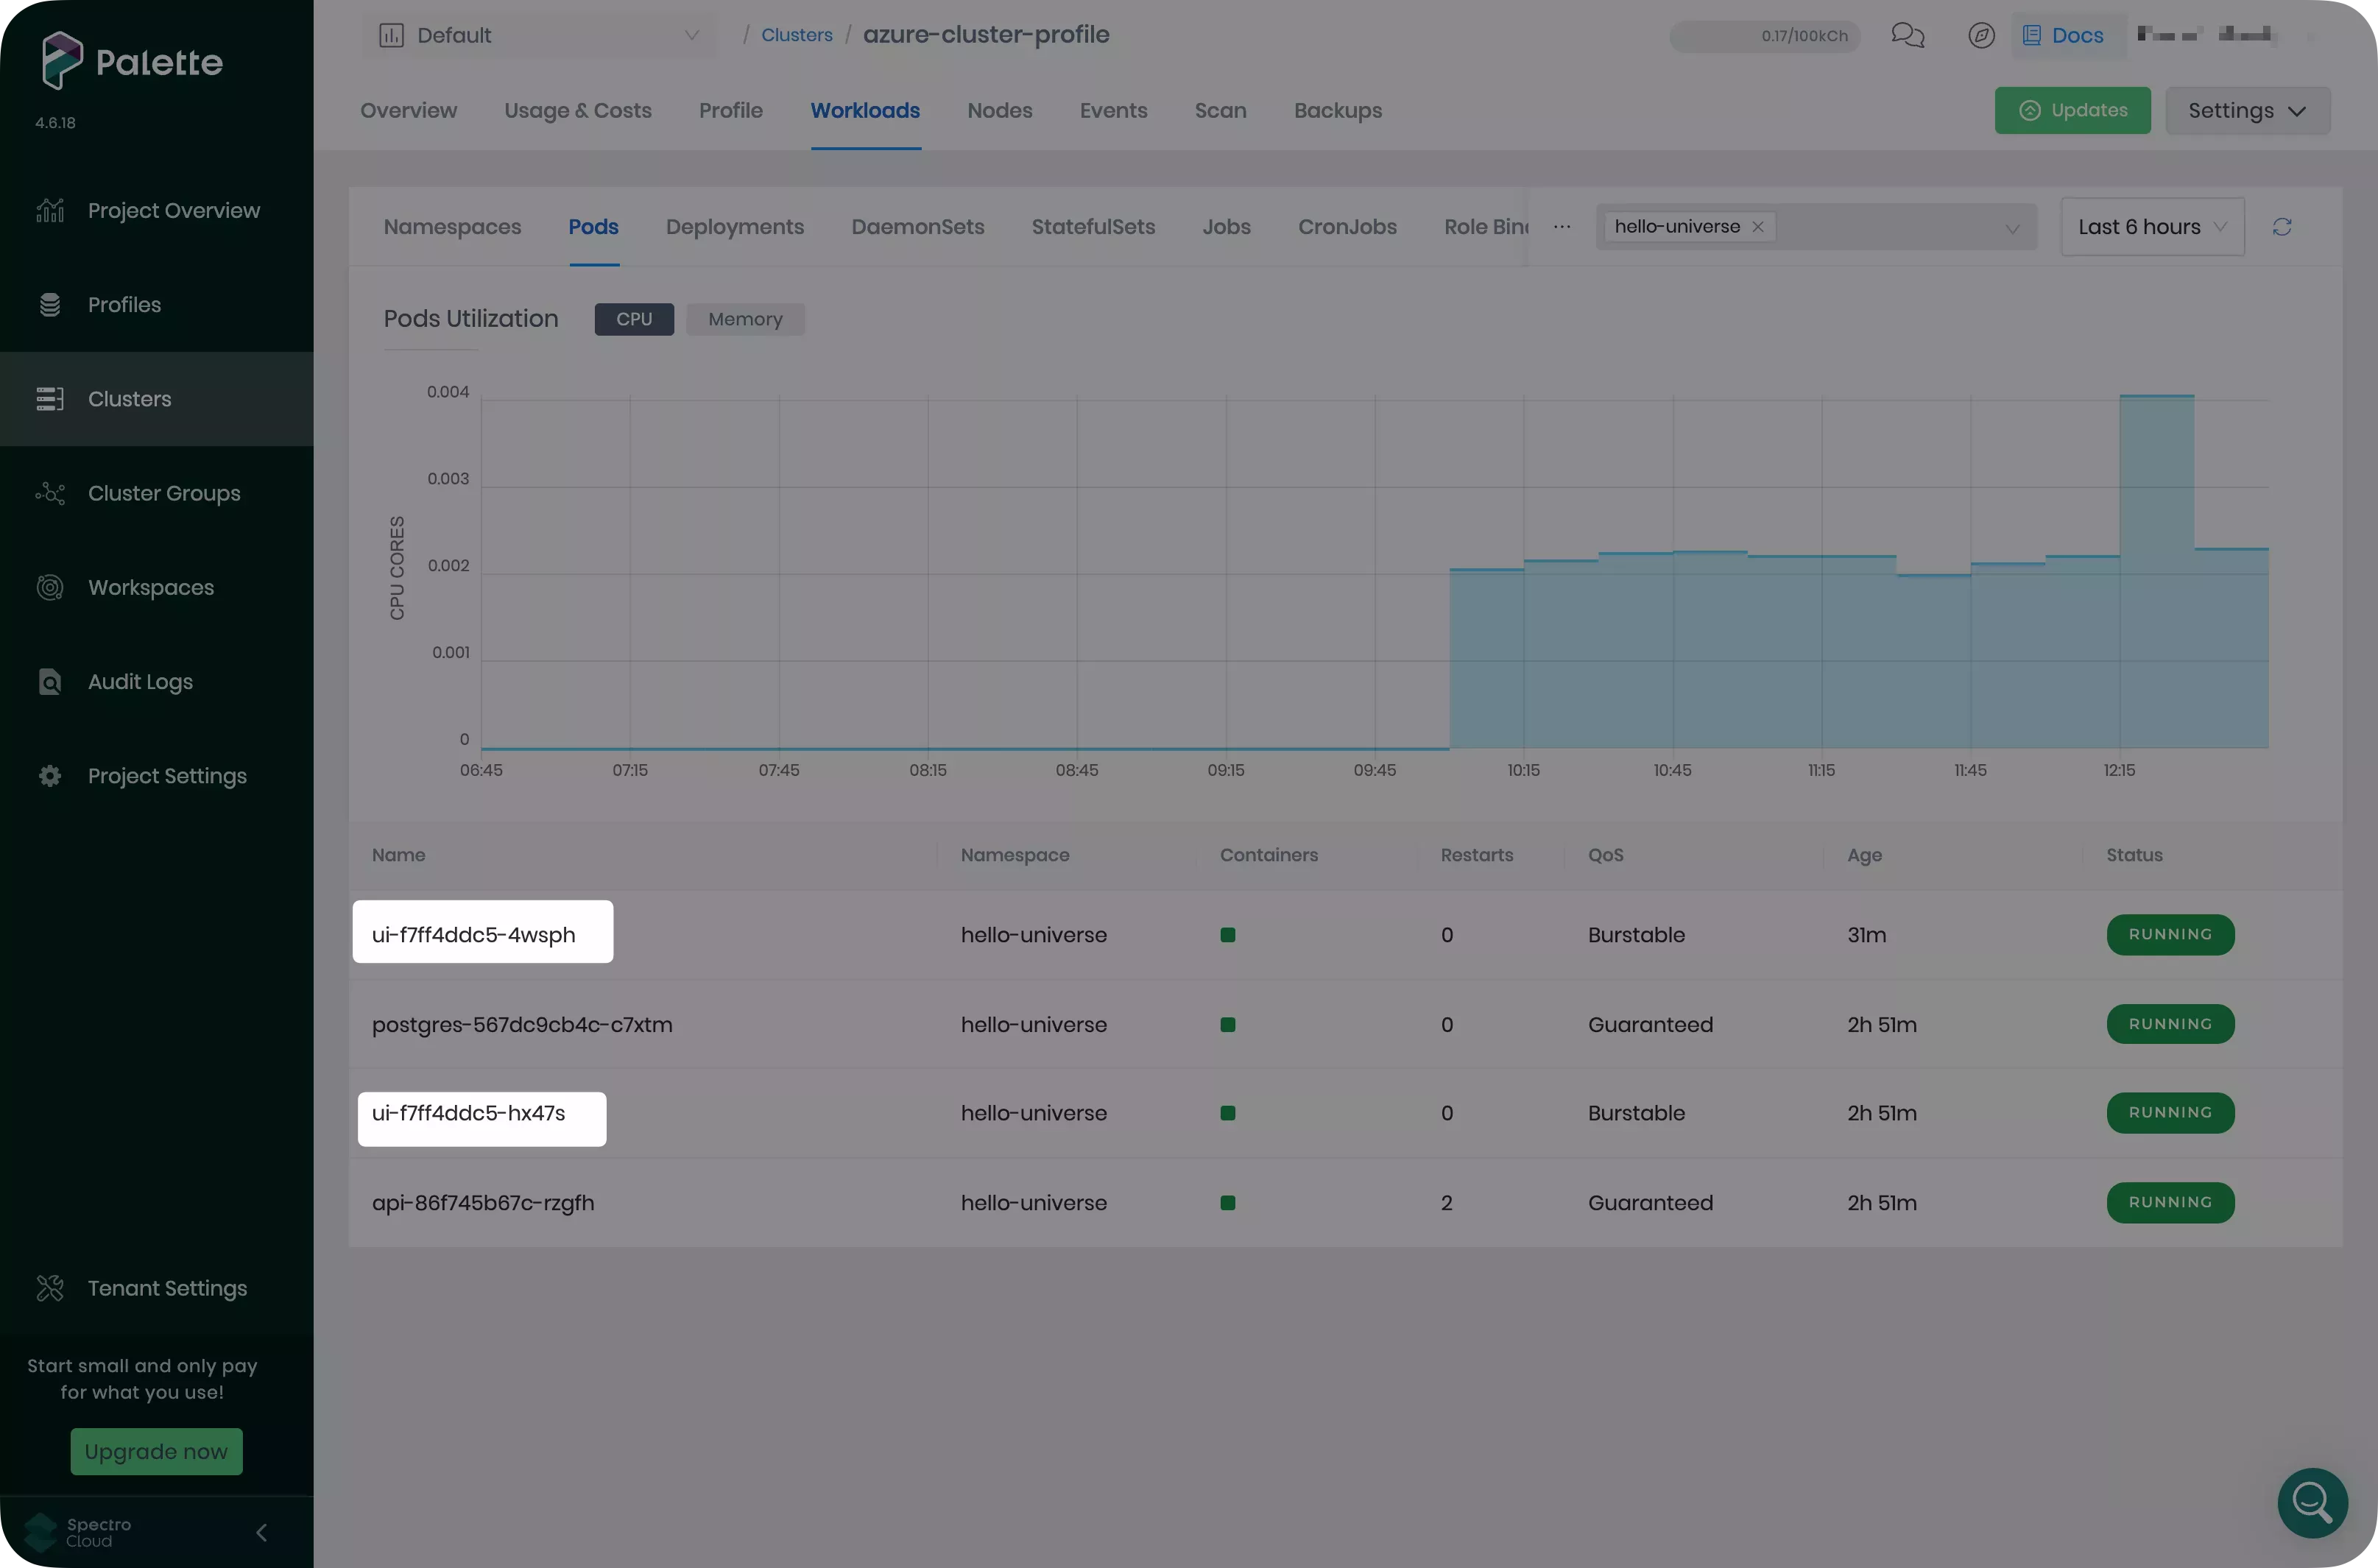
Palette updates your cluster according to cluster profile specifications. Monitor the progress of the update on the Overview tab. When these changes are complete, select the Workloads tab. Then, select the hello-universe namespace.
Three replicas of the UI deployment are available instead of the one specified by your cluster profile. The Palette UI may take some time to reconcile and detect the changes. If needed, select the refresh icon next to the time interval drop-down menu to force a refresh.
Cleanup
Use the following steps to clean up the resources you created for the tutorials.
Navigate to the left main menu and select Clusters. Select the cluster you created in the Getting Started tutorials.
Select Settings to expand the menu, and select Delete Cluster.
A dialog appears. Input the cluster name to confirm the delete action.
The deletion process takes several minutes to complete.
Once the cluster is deleted, navigate to the left main menu and select Profiles.
Select the cluster profile you created in the Getting Started tutorials. Select the three-dot menu to display the Delete button.
Select Delete and confirm the selection to remove the cluster profile. Make sure you delete both versions of this profile.
Wrap-Up
In this tutorial, you updated a cluster profile using three different methods: create a new cluster profile version, cluster profile override, and update a cluster profile in place. You deployed and rolled back the Kubecost application and modified the configuration of the hello-universe deployment using cluster profile updates.
Cluster profiles provide consistency during the cluster creation process and when maintaining your clusters. They can be versioned to store previously working cluster states, giving you visibility when updating or rolling back workloads across your environments.
We encourage you to check out the reference resources below to learn more about Palette.
This workflow can also be completed using Terraform by following the tutorials linked below.